Friday, July 29, 2022

Sweetest Back To School Apples?! ... TGIF Challenge 379:

TGIF Challenge today!  And it is a theme challenge!  I am NOT ready for summer to be over.  So not ready to even start talking about this...but the challenge is back to school!  Wow!  Crazy to think it is time to start thinking about going back to school.  Can't say I am ready at all!  Haha. But this challenge was fun!  And the challenge part about it...I didn't really have any stamps that were calling "back to school" for me.  But then...I looked at the Cherry Builder Punch and thought...hmmmm...those could maybe be apples.  And this card was born...

Colors Poppy Parade, Parakeet Party, Crumb Cake, Pool Party, Basic Black
Inks:  Poppy Parade, Parakeet Party, Soft Suede, Soft Sea Foam, Versamark
Cardstock/Papers: Crumb Cake, Pool Party, Basic Black, Basic White
Stamps: Sweetest Cherries
Tools: Cherry Builder Punch, Timeworn Type Embossing Folder, Heat Tool, Scalloped Contours Dies
Accessories: Basics Embossing Powders, Glossy Dots Assortment, Baker's Twine Essentials Pack

So...what do you think?!  Do they look enough like apples?!  And greeting...I am a bit impressed with myself on this one.  Haha.  This whole thing is from the Sweetest Cherries Stamp Set.  I just had to piece the "year" together by embossing a few other phrases and cutting out the individual letters!  How fun, right?!  Here is the stamp set with the letters I cut out circled...


And just a few more shots of the card:


I really love the Pool Party scalloped piece.  Want to know where it is from?!  It is one of the scalloped rectangles from the Scalloped Contours Dies!  I just die-cut it then adhered it to the backside of my cardstock piece!


Now it's time to see what you are going to make!  Head on over to the TGIF Challenge Blog and play along with us!  

Thanks for visiting!  I can't wait to see what you make!  

Contact: designwithink@gmail.com

Monday, July 25, 2022

Sending Good Thoughts with Paper Pumpkin Fun!

Have you put together your July Paper Pumpkin Kit yet?!  I just did and my heavens...I had SO MUCH FUN!  Want to see the fun I had?!  😀  This kit makes 9 cards with a fun sea "message in a bottle" theme. Love it!  💕 You get the supplies to make 3 each of 3 cards.  I, however, switched things up a little bit.  The first set of three, I made them exactly how the kit directed you to make them...

So cute, huh?!  Love them all!  When making the second set...I kept them mostly the same, just used a few more colors with a few small changes...

Have to admit...love them that much more with the different colors. 😀 (For the coral & seahorse...I just turned them around & used a Blending Brush to add the color I wanted!) Love the starfish stamp also...so added that in a few places.  Added some of the sequins from the Mini Catalog also! 

Here are a few pics of the details:


The third set...I mixed things up a bit.  Had quite a bit of fun with this, I have to admit! 😍 Here is what I made with the last set! 

(The lighting is a bit off, but both the ship & the seahorse are embossed with gold.  See photos below for more accurate pic.)

Check out this fabulously gold seahorse!!! 😍😍😍  Kinda love the whole thing, honestly.  And the only thing I added was a few ink colors, embossing powder, and sequins!  I guess a few scraps of cardstock also.


I love the clear embossed ship in the background!  Have to admit...kinda felt pretty clever stamping that there.  😂 Haha.  It's the little things, right?!

And this gold embossed ship is pretty stellar also. For the starfish banner, I turned a blue banner around (the kit came with an extra) and stamped it repeatedly and then added some ink with a Blending Brush!  Kinda obsessed with that also!  

Thanks for joining me in my Paper Pumpkin Kit fun!  It was amazing and I want to do this every month!  Please let me know if you have any questions!  And if you need help subscribing to Paper Pumpkin...let me know!  💕  Everyone needs some fun happy mail to surprise them in their mailbox each month!  Hee.

Contact: designwithink@gmail.com

Saturday, July 23, 2022

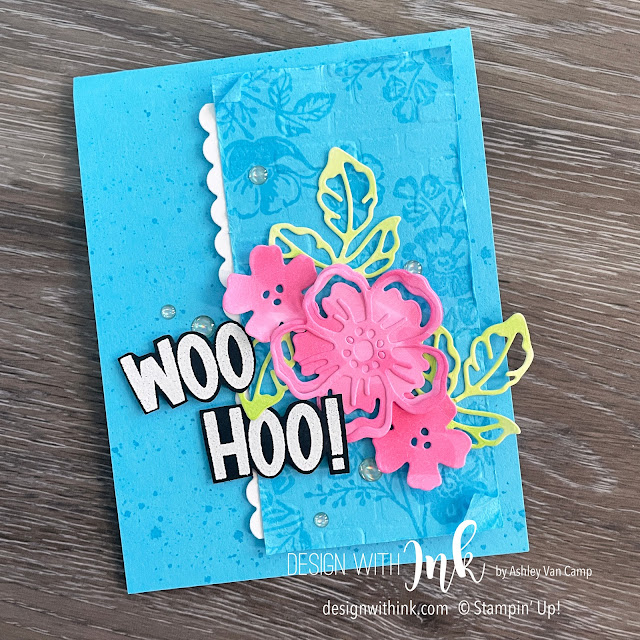
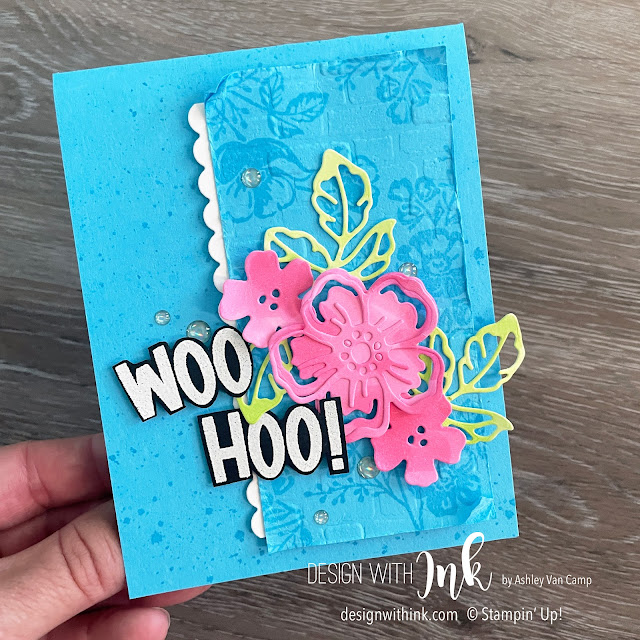
Amazing Phrases With Blended Summer Shadows!

 It is SALE-A-BRATION time!!!!  YIPPEEEE!!!  One of the FREE stamp sets that you can earn is called Amazing Phrasing.  And it packs a greeting punch!  I love it!   Check it out...


Colors Polished Pink, Parakeet Party, Tahitian Tide, Whisper White, Basic Black
Inks:  Polished Pink Blends, Parakeet Party Blends, Tahitian Tide, Versamark
Cardstock/Papers: Tahitian Tide, Basic Black, Basic White
Stamps: Shaded Summer, Amazing Phrasing
Tools: Summer Shadows Dies, Penned Flowers Dies (scallop border), Brick & Mortar Embossing Folder, Heat Tool, Water Painter (splatter)
Accessories: Basics Embossing Powders, Glossy Dots Assortment, Baker's Twine Essentials Pack

Then I stamped on the inside as well...


What do you think?! Love it as much as I do?!  Fun little tip on this card also!  Here is a better. pic of the flowers and leaves...

See the subtle variation of color?!  Want to know how I quickly did that?!  

Simply color on Basic White Cardstock with Blends Markers!  Lots of ways to do this, but all I did was add color with the lightest color and then added some spots of dark.  Swirled over with the light again, but didn't try to make it "pretty" or anything.  Then just die cut your shapes!  See how not-pretty the coloring is...


But how fun it still turns out!


Just a few more pics of some details for you...


This greeting stamp set is SO MUCH FUN!


Check out the SALE-A-BRATION brochure and let me know how I can help you get what you want! 😊

Thank you so much for visiting!  

Contact: designwithink@gmail.com

Tuesday, July 19, 2022

A CASE for Shaded Summer...

My favorite part of being a part of Stampin' Up!, and the papercrafting community as a whole, is the people I have met.  And it is especially fun getting cards from these people!  😀  Today I am sharing a card that I recently received from my friend Kasia.  I LOVE this card...the colors, the layout, just everything about it!  Including the fact that it was made by her as she thought of me!  😍  (She's super talented...if you have seen a Stampin' Up! catalog recently ... you have seen her work!  She works at Stampin' Up! headquarters as a Concept Artist. 💗)  I loved this card so much...I felt like I just had to CASE (Copy And Share Everything or Copy And Selectively Edit) it!  So ... on to the show!  Her card is on the left and mine is on the right! 


How GORGEOUS is her card!  It made it tough making one to follow, because I just liked hers so much more!  Haha.  But...here is the card she made up close...

(I just used my watermark on this photo...but Kasia Jackson is the one that designed and made this card!)

And here is my card up close...


Colors Polished Pink, Mango Melody, Flirty Flamingo, Pool Party, Granny Apple Green
Inks:  Polished Pink, Mango Melody, Flirty Flamingo, Granny Apple Green Marker, Versamark
Cardstock/Papers:  Pool Party, Basic White, Rose Gold Specialty Paper, Design A Daydream Host Designer Series Paper
Stamps: Shaded Summer
Tools: Summer Shadows Dies, Penned Flowers Dies, Into the Clouds Embossing Folder, Heat Tool
Accessories: Basics Embossing Powders, 2021-2023 In Color Opal Rounds, Baker's Twine Essentials Pack

I know, I know...her card is way more fun!  But I ended up like this one okay.  Haha.  I love the Designer Series Paper background.  I LOVE this stamp set and coordinating die set (Shaded Summer Stamp Set with Summer Shadows Dies) and I love that scalloped edge!  (The scallop die is from the Penned Flowers Dies and cut from Rose Gold Specialty Paper.)  That background Designer Series Paper is AMAZING as well!  It is actually only available to earn FOR FREE!  Let me know if you need it and I can help you get it!  😍


Inking up these stamps were so much fun!  I used Sponge Daubers, ink, and one marker!  I colored the flowers by just "pouncing" the color onto the flowers.  (I used Polished Pink for the pink and Mango Melody for the orange.)  Then once I had the base color on, I "pounced" some areas of Flirty Flamingo over it.  (I would wipe it off on scratch paper so I was cleaner with my ink.)  Then I just colored the green parts with Granny Apple Green marker.  I wanted a little variation of color, so that is what I did.  It was NOT a "neat" process.  I just went with it, inked it up, huffed on my stamp to re-moisten the ink, and then stamped!  It was fun to see what it would look like because I had no idea!  Haha. 


And I am obsessed with this Rose Gold paper!  There is a variety of finishes in this Specialty Paper pack and it is all GORGEOUS!  This one was the more matte finish.  ♡ LOVE! LOVE! LOVE! ♡


Hope you enjoy!  Where do you find inspiration when you craft?!  Don't be afraid to look to your friends if you are needing help!  😁

Thank you so much for visiting!  Please let me know if you have any questions or need help with anything!  Would love to help you with any of your papercrafting needs...including helping getting your hands on some Stampin' Up! supplies!  😍

Contact: designwithink@gmail.com

Friday, July 15, 2022

Versatile Merriest Christmas...TGIF Challenge 377:

Christmas in July...are you a fan?!  I am not.  Haha.  So this weeks TGIF Challenge is a real challenge for me!  😂  But here is my inspiration for you for this week's challenge!  

Colors So Saffron, Polished Pink, Pale Papaya, Flirty Flamingo, Coastal Cabana, Granny Apple Green
Inks:  Polished Pink, Pale Papaya, Flirty Flamingo, Coastal Cabana, Granny Apple Green, Versamark
Cardstock/Papers:  So Saffron, Basic White, Fluid 100 Watercolor Paper
Stamps: Merriest Moments
Tools: Merriest Frames Hybrid Embossing Folder, Water Painter, Heat Tool
Accessories: Linen Thread, Adhesive-Backed Sequins & Gems, Basics Embossing Powders

Wait, what?!  It's supposed to be a Christmas Challenge, right?!  

Well I used the challenge as a jumping off place to use a Christmas stamp set to make a NON-Christmas card with it!  😀  Look how versatile Merriest Moments Stamp Set and Merriest Frames dies are!  Here are some more pics of the details:


The only stamp set I used was the Merriest Moments...even for the greeting!  I just cut this out from the "Thinking of you this festive season" greeting!  

What are you going to do for this Christmas in July Challenge?!  I can't wait to see!  Head on over to the TGIF Challenge Blog to see what the other fabulous designers made, and to play along & post what you make!  

Let me know if you have any questions or need any help getting any Stampin' Up! supplies!  Would love to help you with all of your paper crafting needs!  Thank you for visiting!

Contact: designwithink@gmail.com

Thursday, July 7, 2022

You Can Do It All With A Fish & A Wish Bundle!!!

A fish AND a wish?!  Well...my wish would be to be under the ocean surface hanging with fishes every day!  😂 The days I can't do that...I guess making a card with fishes is the next best thing!  But when you can't decide if you want to make a simple, casual, or anything but casual...just make more than one!  I love that A Fish & A Wish Bundle can help you do it all!


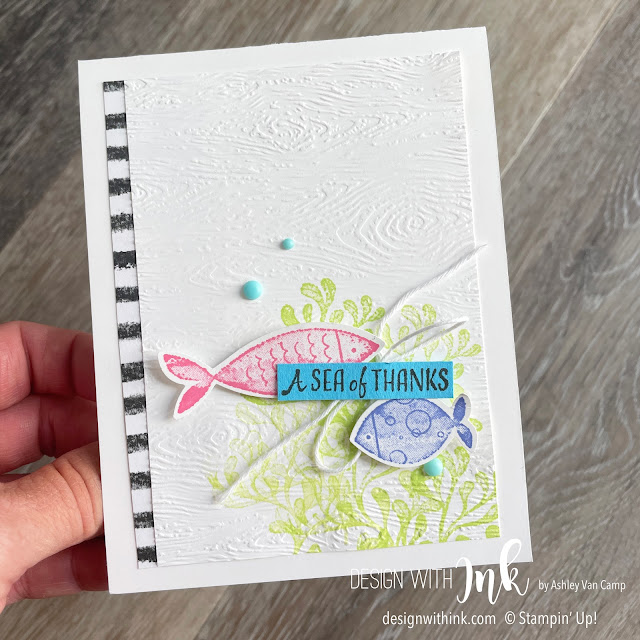
The one on the left was quite quick, but still was able to fit in a lot of texture and fun.  The one on the right took more time, for sure, but I got to release a whole bunch of my inner artist!  I can break down a few of the details...

Colors Parakeet Party, Tahitian Tide, Polished Pink, Orchid Oasis, White, Black
Inks:  Parakeet Party, Polished Pink, Orchid Oasis, Memento Black
Cardstock/Papers:  Basic White, Thick White, Tahitian Tide, Perfectly Penciled Designer Series Paper
Stamps: A Fish & A Wish
Tools: Timber 3D Embossing Folder, Fish Builder Punch
Accessories: Baker's Twine Essentials Pack (white twine), 2022-2024 In Color Matte Decorative Dots

The first thing I did on the card front was stamp the seagrass multiple times in Parakeet Party on the bottom right corner.  Then I just embossed it using the Timber 3D Embossing Folder.  LOVE the subtle texture that adds, without much bulk!  Then I stamped a couple fishes and my greeting, punched the fishes out, and added all the little details.  It came together so quickly!


This next card took just a bit longer than the first one.  😊  But it was not hard at all!  Just a lot of fun texture and layers.  

Colors Parakeet Party, Tahitian Tide, Polished Pink, Orchid Oasis, White, Black
Inks:  Parakeet Party, Polished Pink, Orchid Oasis, Tahitian Tide, Versamark
Cardstock/Papers:  Basic White, Thick White, Perfectly Penciled Designer Series Paper, Fluid 100 Watercolor Paper
Stamps: A Fish & A Wish
Tools: Fish Builder Punch, Water Painter, Heat Tool
Accessories: Baker's Twine Essentials Pack (white twine), For Everything Fancy Sequins, Basics Embossing Powders

I did a watercolor wash and splatter first (don't splatter until wash is dry...I usually dry with a Heat Tool so it's quick)...using Tahitian Tide ink.  Then I stamped over it with one of the fish stamps. Just lots of fun texture!  I love the subtle texture on the Fluid 100 Watercolor Paper too.  


Then I stamped some of the fish, punched them out, stamped some seagrass, fussy cut those out (time consuming but oddly stress relieving!), and added all the little details.  So much fun!  

Even distressed the Watercolor Paper edges!  All about that subtle texture!  

So what do you think of these cards?!  I hope you enjoy! Which one would you be more inclined to make?!  Please let me know if you have any questions!  I would love to help you with all your papercrafting needs!  And of course would love to help you get your hands on any Stampin' Up! products you need!  

Thank you so much for visiting!!!

Contact: designwithink@gmail.com

Friday, July 1, 2022

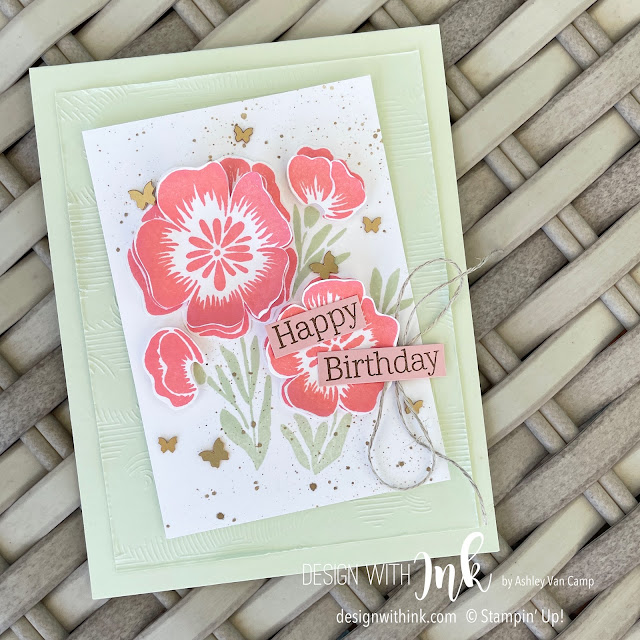
Lovely & Lasting Color Challenge...TGIF Challenge 375!

 I  ♡ LOVE ♡  a good color challenge!  Love it!  And that is what we have for this weeks TGIF Challenge!  So let's get to it! 

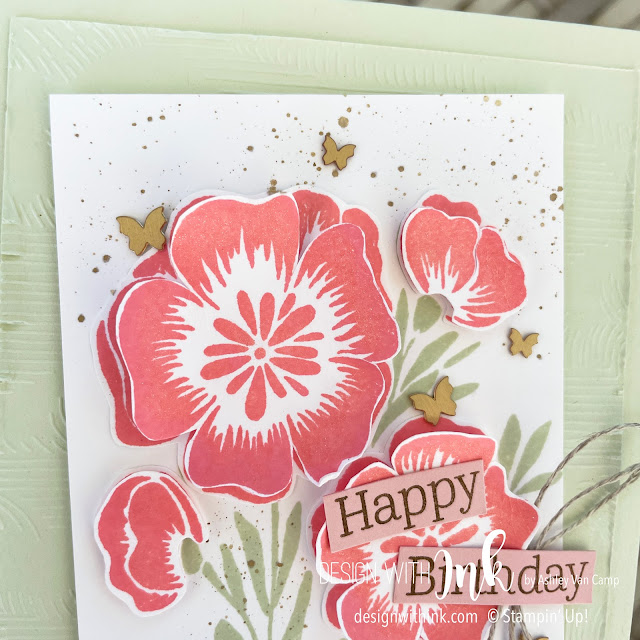
Colors Soft Sea Foam, Flirty Flamingo, Blushing Bride
Inks:  Soft Sea Foam, Flirty Flamingo, Soft Suede
Cardstock/Papers:  Basic White, Soft Sea Foam, Blushing Bride
Stamps: Lovely & Lasting
Tools: Into the Clouds Embossing Folder
Accessories: Linen Thread, Brushed Brass Butterflies

I love this card!  I love this stamp set.  It comes with a fun punch in a bundle, but for this card I just used the stamp set.  I stamped the floral image a few times in a few colors.  The first in Soft Sea Foam onto the cardstock piece that I was putting onto my card front.  Then I stamped the image twice in Flirty Flamingo, and cut out the floral pieces.  I wanted a layered look, so for the top layer, I snipped the petals and cut off some of the flower so that I could use my bone folder to curl some of the petals.  I really love how it came out!  (I also really love the Into the Clouds Embossing Folder that I used on the background.  Swoon! 😍😍😍


I hope you enjoy this card!  Thank you so much for visiting!  Now...head on over to the TGIF Challenge Blog to play along with us!  I can't wait to see what you make!!! 

If you have any questions or need any help in getting your hands on any Stampin' Up! supplies...please let me know!  

Contact: designwithink@gmail.com

Grateful For Textured Floral!

I love the Textured Floral Stamp Set & coordinating dies from Stampin' Up!  They are so gorgeous and so versatile.  So sharing a fun...