Saturday, September 14, 2024

Season of Elegance Suite Mini Artisan Design Team Blog Hop!

Woot!  Let's get right to it!  Another fun Stampin' Up! Artisan Design Team Blog Hop! This month my group is using products from the Season of Elegance Suite!  This suite is PACKED with GORGEOUS holiday inspired products!  I am so excited to share what I made with you!  SO let's get started! 


Here are all the projects that I made!  I am going to break them down a little bit more below!


This one was so much fun!  I took some of the fabulous Season of Elegance Designer Series Paper (that has GORGEOUS foiling on it!) and embossed some of the trees.  Then die-cut the trees and layered them over it.  Love the look it gives! 


Then for the next card, I went all in with using the dies that make these DARLING bows!!!


Look how much fun this is!  I LOVE LOVE them!  I stamped a fun background, layered it on cardstock, then went to town making the bows.  They are so quick and easy to do!  ***TIP:  use a bone folder to kinda curl your cardstock before folding the pieces, and it make this stunning cute bow! 


I also wanted to make a cute tag so I just die-cut a big tree with the fun "christmas" die-cut and easy peasy! 


What do you think?!  Is your mind flowing with possibilities for this suite?!  Well guess what?!  So much more gorgeous inspiration to come!  Cause it's time to keep hopping! 

NEXT IN OUR HOP IS ...

Daniela: @edelpappe  https://www.edelpappe.de/blog/

Her projects are gorgeous!!  You better follow along to see! 😀 Over on Instagram is the best place to see them!

Full list of hoppers: 

Monique:  @stampin_met_monique  
Ashley: @designwithink  ☆  This is me!  ☆
Daniela: @edelpappe
Maheswari: @maheswarirajaguru
Su: @aromasandart


Thank you so much for visiting!  I hope you enjoy this hop!  Please let me know if you have any questions or need any help ordering any Stampin' Up! products! I would be happy to help you with your papercrafting needs! 

Contact: designwithink@gmail.com

Tuesday, September 10, 2024

Bold Pop With Changing Leaves Bundle!

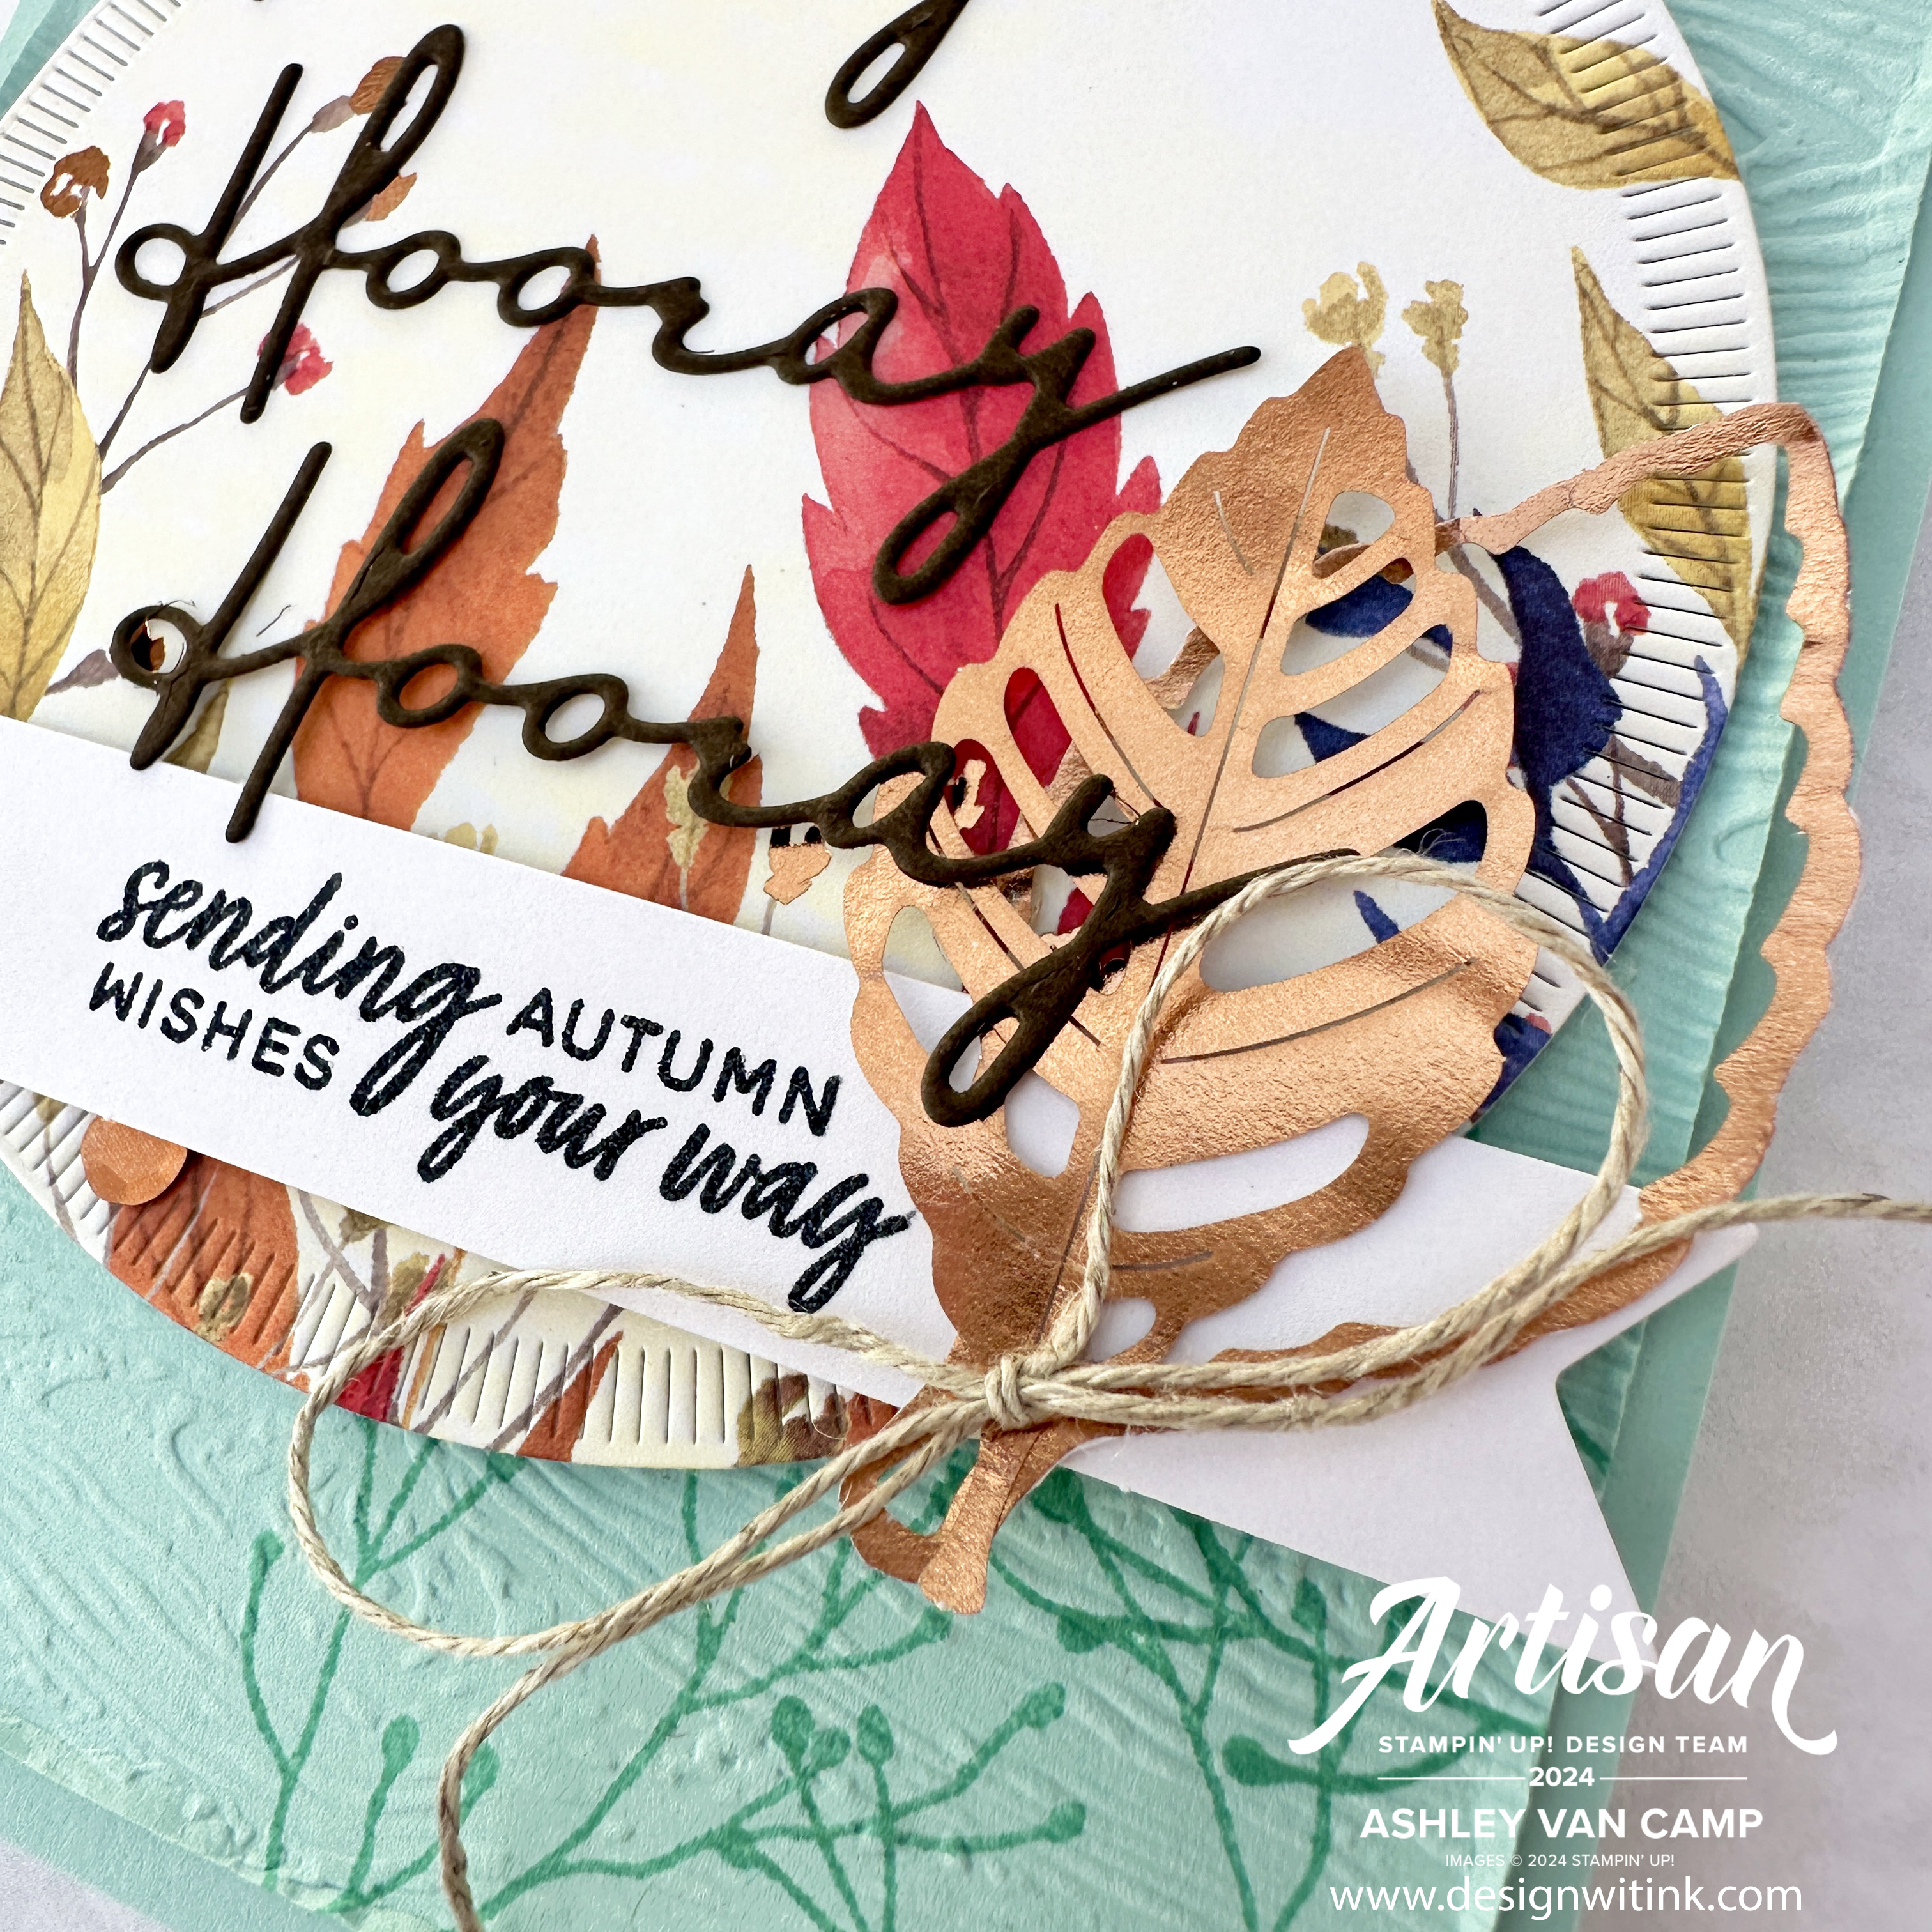
I had a vision in my head for a card, & couldn't get it out of my head ... so had to just create it.  Haha.  I LOVE the Changing Leaves Bundle that is an Online Exclusive from Stampin' Up!  Fun fact ... I was going to use it on the last card I made for the TGIF Challenge this week.  (Click HERE to see that card.)  But the large leaf image I wanted to use was a bit too large for what I wanted with that card, so I used the Spotlight in Nature stamp instead.  Well ... that's probably why I got this card idea in my head and couldn't get it out.  Haha.  I wanted to do a bold & graphic card with the leaf bundle.  Black & white with pops of bright color filled my head and this is what came out on paper: 

All supplies are from ©️ Stampin' Up!

Colors Basic Black, Basic White, Melon Mambo, Coastal Cabana
Inks: VersaMark, Pretty in Pink, Coastal Cabana, BLENDS: Melon Mambo
Cardstock/Papers: Basic Black, Basic White, Coastal Cabana
Stamps: Changing Leaves, Saying Hey
Tools:  Perennial Postage Dies, Changing Leaves Hybrid Embossing Folder (also comes with the dies!), Heat Tool
Accessories: White & Clear Embossing Powder (Basics WOW! Embossing Powder), Iridescent Faceted Gems

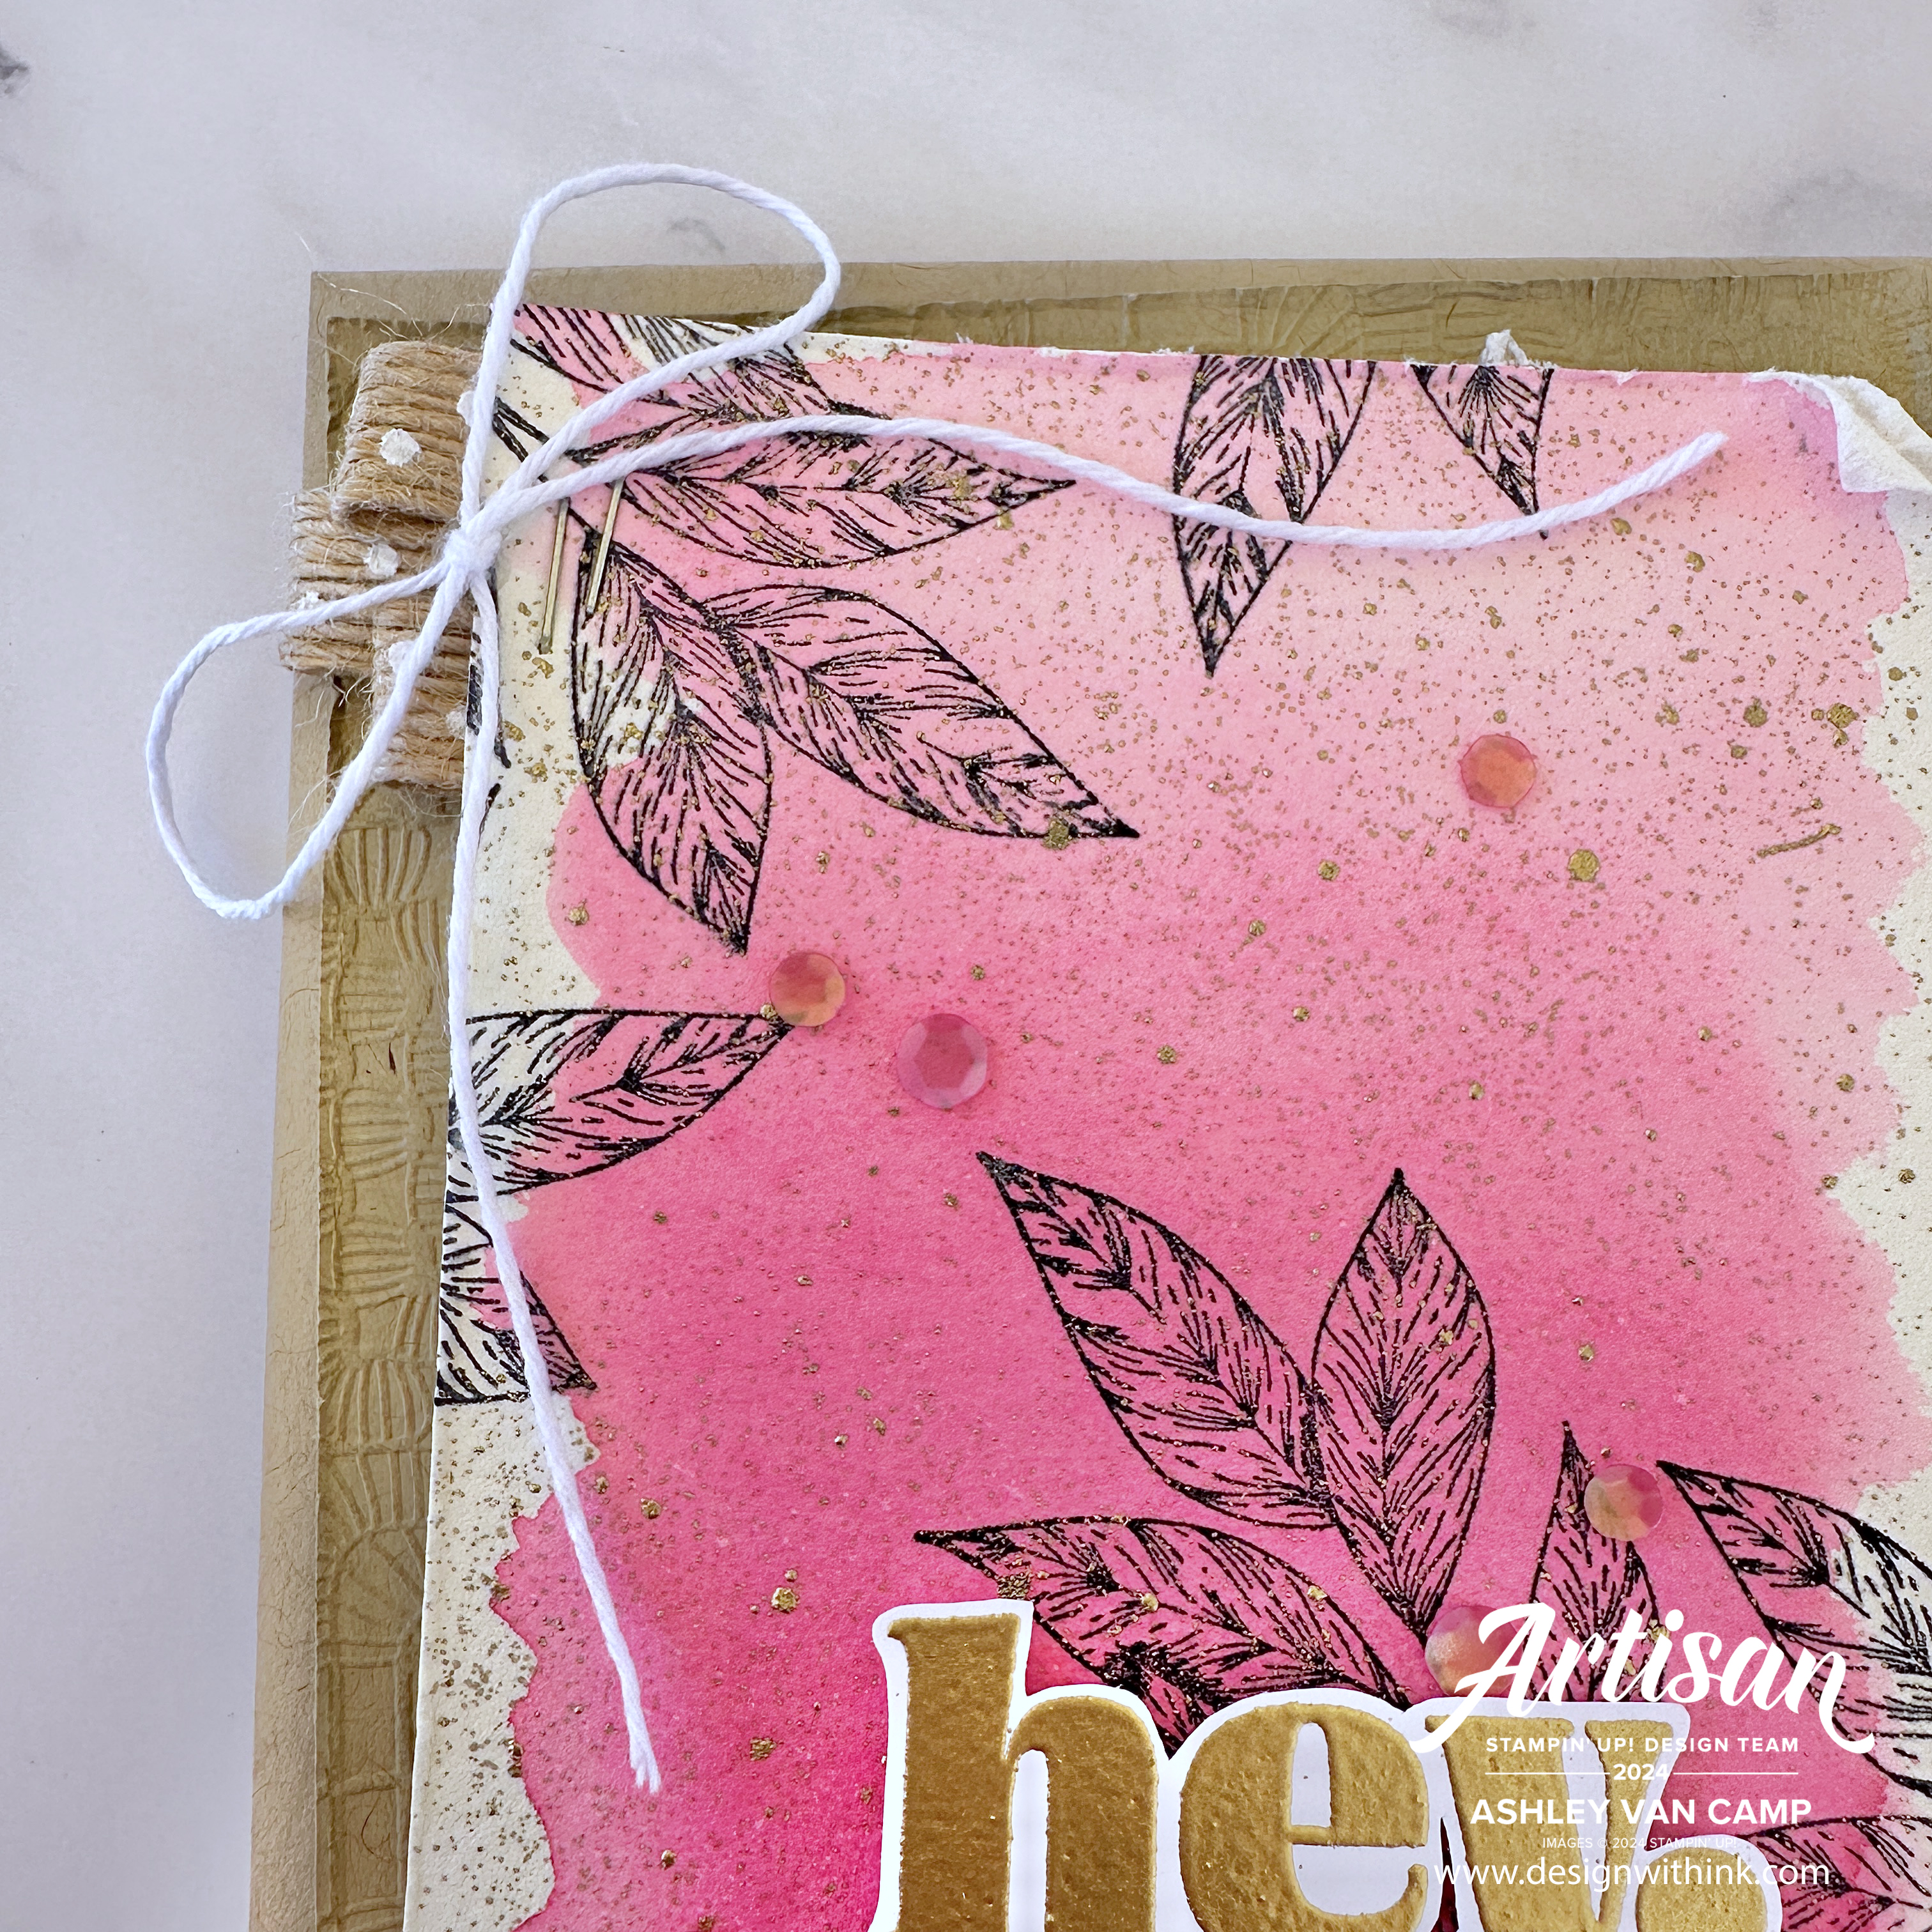
You can see I used the Saying Hey Stamp Set again.  Yeah ... kinda can't get enough.  I LOVE this stamp set!  And it was perfect for my bold & graphic card. 😁

I got a little picky with the look I wanted for the "hey" greeting.  So it was a bit fussy.  Hee.  But I love how it turned out.  I stamped it in VersaMark onto Coastal Cabana cardstock.  Then individually cut out each letter, adhered it to Basic White cardstock, and fussy cut that. I just was picky with the color that I wanted, and so I just went with it!  Hee.   


I also was a bit picky on the color pink I wanted on this card.  Melon Mambo cardstock was too dark for what I wanted & Pretty in Pink was too light.  So what did I do?!  Why ... I used my Light Melon Mambo Blends Marker & colored on some Basic White cardstock!  It was the perfect pink!  😍  Once it was dried ... that was when I embossed the "thanks."  

I also used this same trick for the side detail made with the Perennial Postage Dies.  I just out a piece of the largest shape, and then just colored the side with the same Light Melon Mambo Blends ...


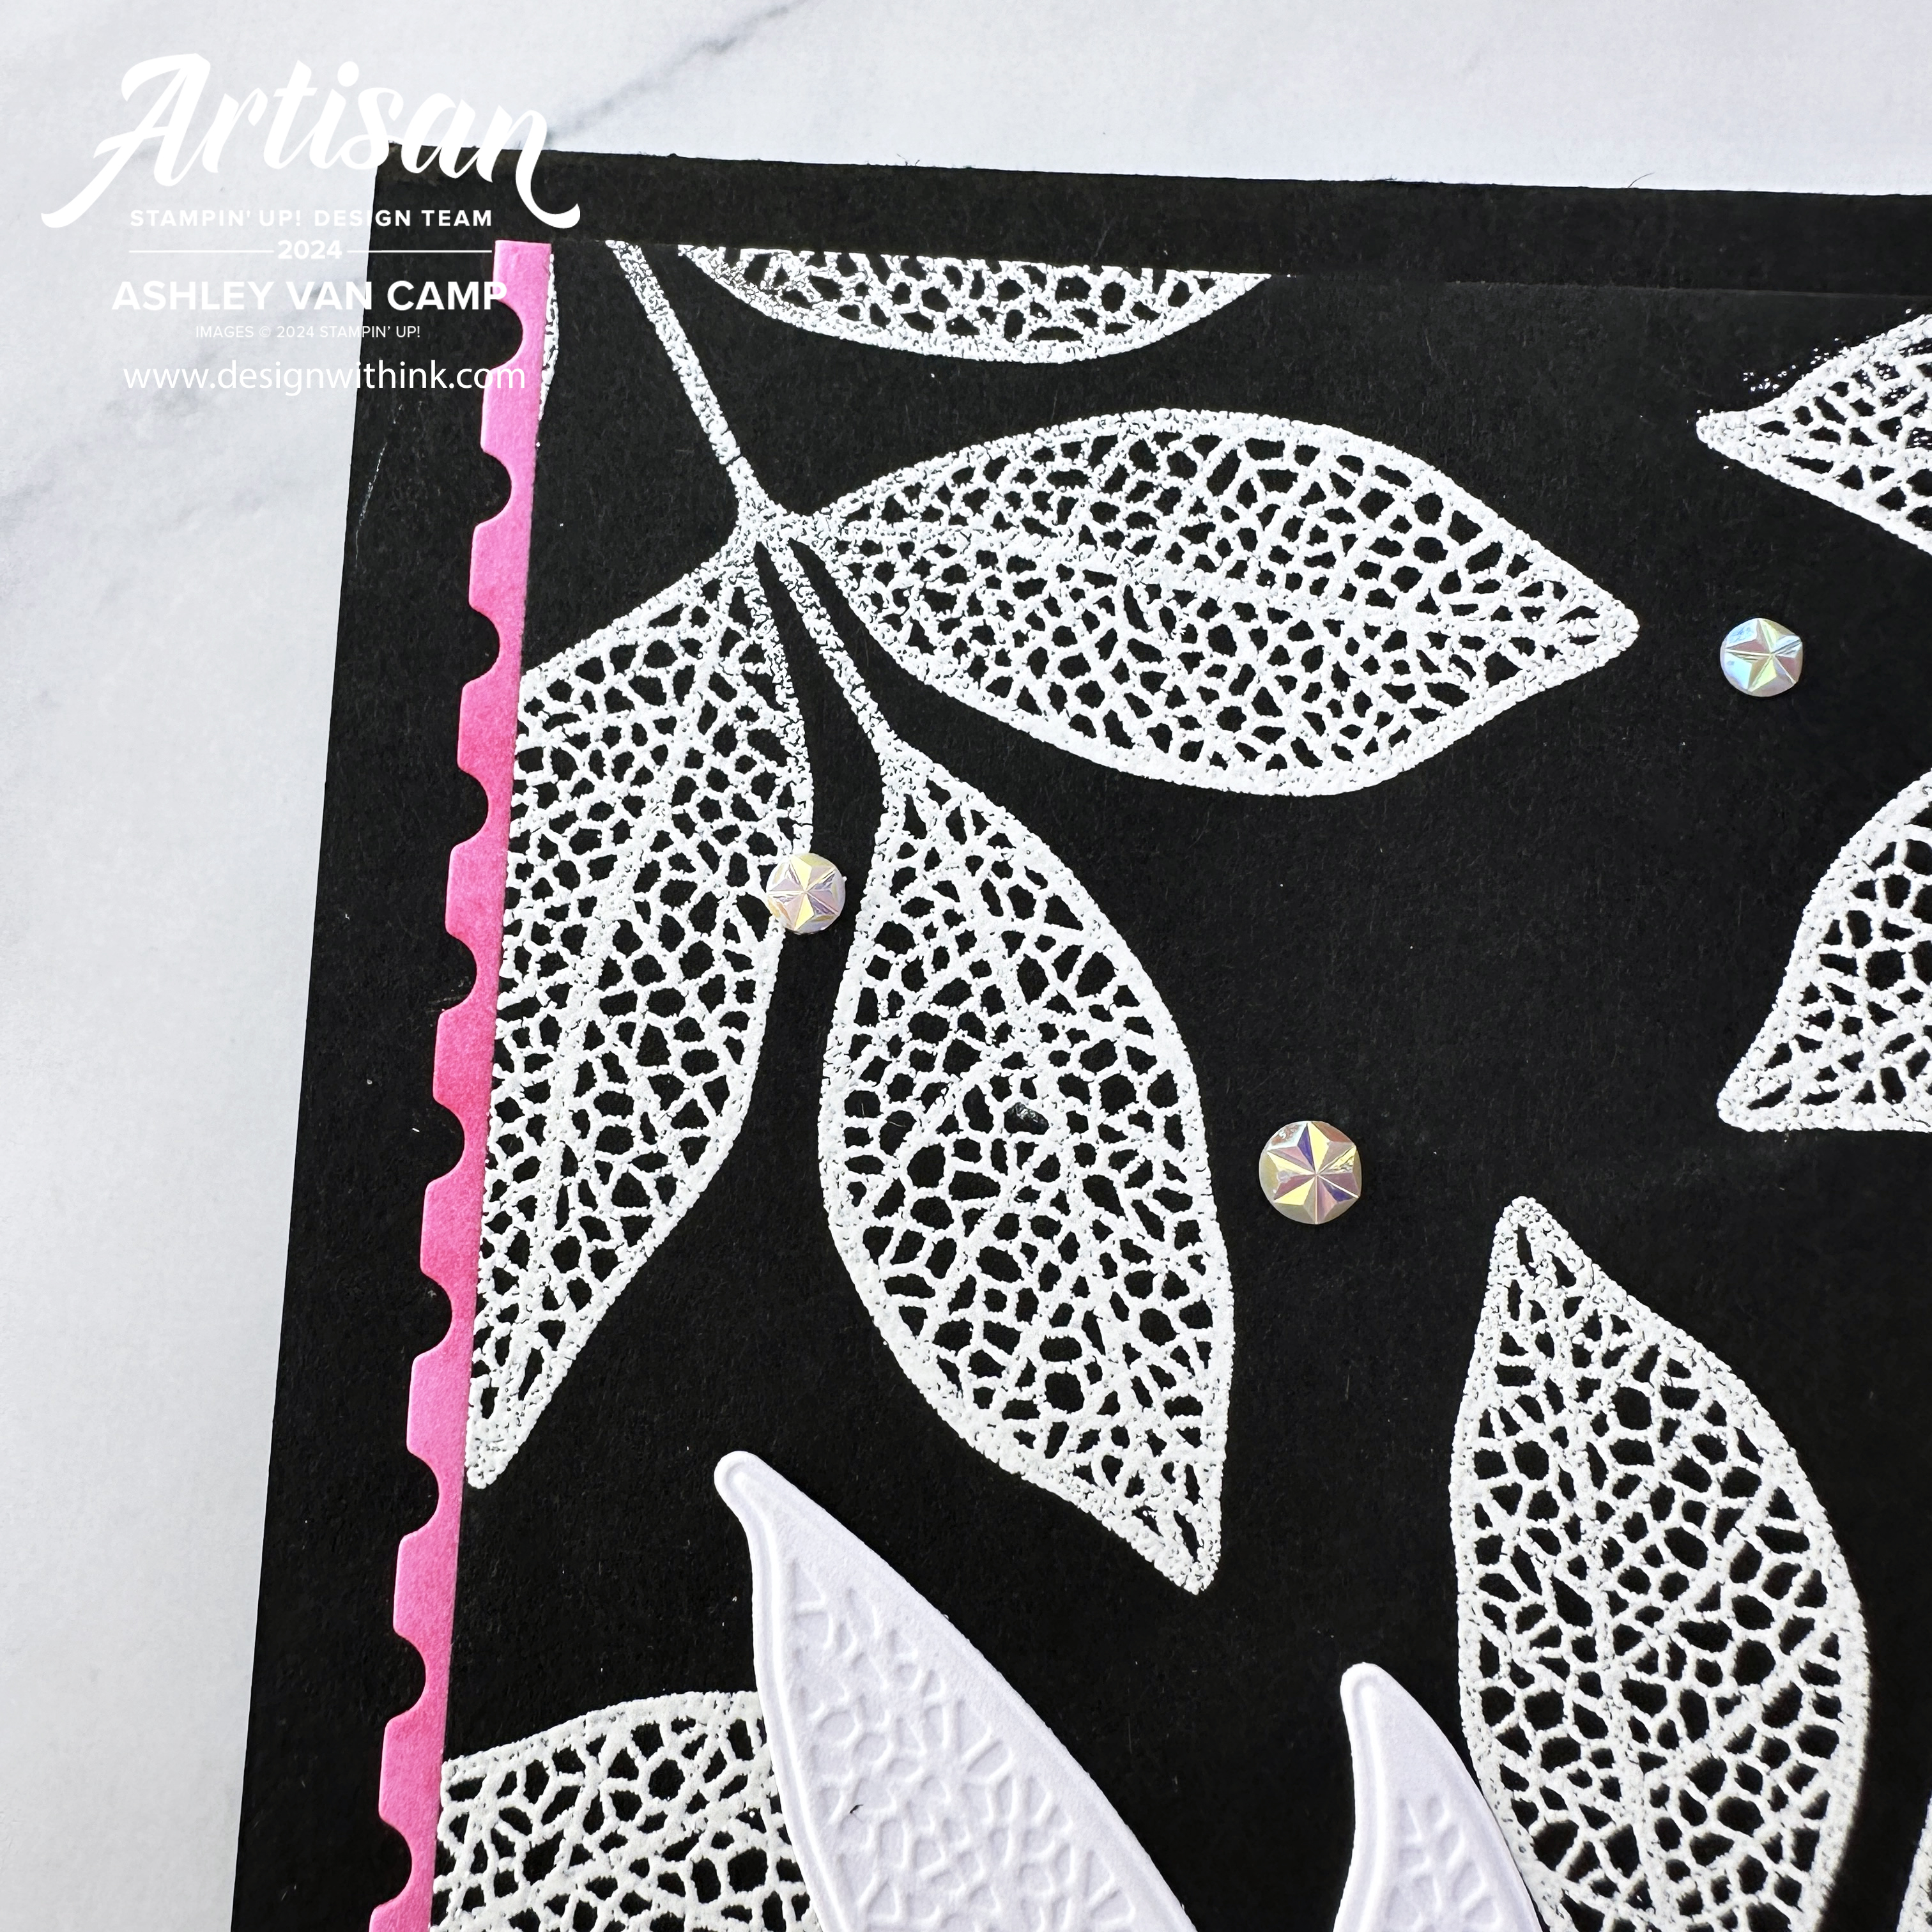
Just look how cute it is!  Once again ... perfect color pink for what I had in my head!  

This card just makes me happy to look at it.  And this Changing Leaves bundle is PHENOMENAL!  The stamps are gorgeous & fun (just LOOK AT HOW fun it is in black & white) and the rest is magic!  The bundle comes with a Hybrid Embossing Folder & coordinating dies. (Keep reading for an explanation of that!) Notice the white die-cut leaf under the "hey"?!  ... 


Yeah ... they Hybrid means that you can die-cut & emboss all in one pass through the Stampin' Cut & Emboss Machine!  It is so wonderful!  Here is a photo so hopefully you can see what I mean better: 


Love it!  Now one last little bit of info.  This is a black card, so I added a white insert on the inside to write in.  Didn't want to leave it naked so I did a few quick stamps and VOILA!  Fun and coordinated inside! 


I hope you enjoy this card!  Thank you so much for visiting my blog!  Please don't hesitate to reach out if you have any questions at all!  Would love to help you with all your papercrafting needs!

If you need any help getting any Stampin' Up! supplies (and live in the US), I would be happy to help with that as well!  

Contact: designwithink@gmail.com

Friday, September 6, 2024

Spotlight On Nature Color Challenge! TGIF Challenge #489!

Happy Friday to you!  Are you ready for a FUN new TGIF Challenge?!  And ... a color challenge to boot?! WOOT!  Let's celebrate!  First up ... I am going to share my card!  Then I will tell you the colors that are in the challenge.  😊  After that ... more photos of the details of the cards.  Then it will be time to head on over to the TGIF Challenge Blog to play along yourself with this weeks challenge!  Can't wait to see what you make ... but first ... can't wait to show you what I made! 


Can you guess the colors I used?!  Here is a hint:

(and by hint, I mean here are the colors.  Hee.)

I had a lot of fun playing with these colors!  More fun than I thought I would have, actually.  😝 The fun part about such a rich color like Berry Burst ... it gives such a gorgeous ombre look! 

Colors Berry Burst, Night of Navy, Crumb Cake, Gold
Inks: Berry Burst, Night of Navy, VersaMark, White Craft Ink
Cardstock/Papers: Crumb Cake, Night of Navy, Basic White, Fluid 100 Watercolor Paper
Stamps: Spotlight on Nature, Saying Hey
Tools:  Cute Crochet Embossing Folder, Heat Tool, Water Painter
Accessories: Gold Embossing Powder (Metallics WOW! Embossing Powder), Baker's Twine Essentials Pack, Adhesive-Backed Sequins Trio

The ombre was the inspiration to this whole card.  😍  Once I decided that's what I wanted to do - to show how much depth Berry Burst has - the rest just came together.  I LOVE this leaf stamp -from the Spotlight On Nature Stamp Set - and I stamped those in Night of Navy.  

This card was screaming for some gold accents to me ... so since gold is kinda just a fancy Crumb Cake ... I thought it could work.  Hee.  So I embossed the sentiment with gold embossing powder and then also added some gold embossed splatter! 


To get all that splatter, I actually used White Craft Ink & a Water Painter.  Just splattered some of the white ink on the card, poured my gold embossing powder over it, & then heat set.  It is so gorgeous ... in my opinion.  Hee. 


I hope you enjoy this card & all the details and layers.  Now it is time to head on over to the TGIF Challenge Blog to see what the other fabulous designers on the team have made this week & then to play along with us on the design team!  💗💗💗 Truly can't wait to see what you make with these colors! 

Please let me know if you have any questions!  Would love to help you with all your papercrafting needs!  If you live in the United States ... would love to help you get your hands on any Stampin' Up! supplies you need! Spotlight on Nature Stamp Set, anyone?!  Hee.  

Thanks agian for visiting!  

Contact: designwithink@gmail.com

Wednesday, September 4, 2024

Cheerful Daisies With Thoughtful Moments!

Just a quick thank you card for you today!  I think this would definitely make anyone feel appreciated!  And I have to say ... I totally love the Thoughtful Moments Hybrid Embossing Folder & Dies ... that is where the "thank you" greeting comes from!  (All supplies used are from Stampin' Up!)  And just saying ... kinda obsessed with the ☆NEW☆ Basic Beige color from Stampin' Up! these days!  That is the card base color of this card.  Isn't it gorgeous?! 

Colors Soft Sea Foam, Bubble Bath, Lemon Lolly, Basic Beige, Gold, Basic White
Inks: Soft Sea Foam, Bubble Bath, Lemon Lolly, Crumb Cake, VersaMark
Cardstock/Papers: Basic White, Bubble Bath, Gold Foil Sheets, Basic Beige
Stamps: Cheerful Daisies
Tools:  Timber Embossing Folder, Thoughtful Moments Hybrid Embossing Folder (also comes with the dies!), Heat Tool, Water Painter
Accessories: Gold Embossing Powder (Metallics WOW! Embossing Powder), Baker's Twine Essentials Pack, Iridescent Faceted Gems

Just some simple stamping & some details ... and this card is ready to give to someone you appreciate!  Here are a few more details! 

The Basic White panel was just stamped with the daisy stamps.  I used Bubble Bath, Lemon Lolly, & Soft Sea Foam.  I love the subtle colors and "vibe" it gives this card.  I then did some Crumb Cake splatter.  


Again ... the greeting is from the Thoughtful Moments Hybrid Embossing Folder & Dies.  One pass through the Stampin' Cut & Emboss Machine cuts & embosses the greeting!! 

I did do a little bonus on this one.  After it was cut out ... I inked up the Stampin' Brayer in VersaMark ink and LIGHTLY rolled it over the embossed greeting.  Then added some gold embossing powder & hit it with the Heat Tool.  Yeah ... it is a little "sloppy" and got on the edges too ... but I didn't mind and kinda think it adds to the charm of the card.


These stripes are done with a Stampin' Blends Maker.  I just drew lines on a strip of Bubble Bath cardstock, using the same color Blends Marker, with both ends of the marker tip to get the variation.  Then added a strip of Gold Foil Sheet and the stripe cardstock to the side!  So easy & such a fun touch! 


All in all ... love how it turned out!  Please let me know if you have any questions!  Would love to help you with all your papercrafting needs!  Don't hesitate to reach out! 

Contact: designwithink@gmail.com

Season of Elegance Suite Mini Artisan Design Team Blog Hop!

Woot!  Let's get right to it!  Another fun Stampin' Up! Artisan Design Team Blog Hop! This month my group is using products from the...