Saturday, June 28, 2025

Sunshine Vibes! With the Artisan Design Team!

Well yay!  It is product spotlight time with some of the Stampin' Up! 2025 Artisan Design Team!  This time we are sharing fun inspiration made with the Sunshine Vibes Bundle!  YES!  I can't get enough of this!  Hee.  So let's get started! 


Both of these cards were SOOOO! MUCH! FUN! to make!  Let me show you a few details about them!  All supplies used are from Stampin' Up! 

First tip: Stamp the half sun stamp twice to make a full circle.  Then stamp the rays around it.  Great thing about these photopolymer stamps - you can see through them to be able to line it up well.  

Second tip: Draw lines with a Blends Marker (Nope - didn't use a ruler.  Wanted a more whimsical, not perfect, vibe since you were just seeing a bit peek out.  Use a ruler if you want more exact spacing & straight lines.

Third tip:  Color some Blends Marker onto Basic White Cardstock.  You can control color saturation by using Blends.  Let dry.  Then emboss over them.  

Yeah ... I love this card! 😃


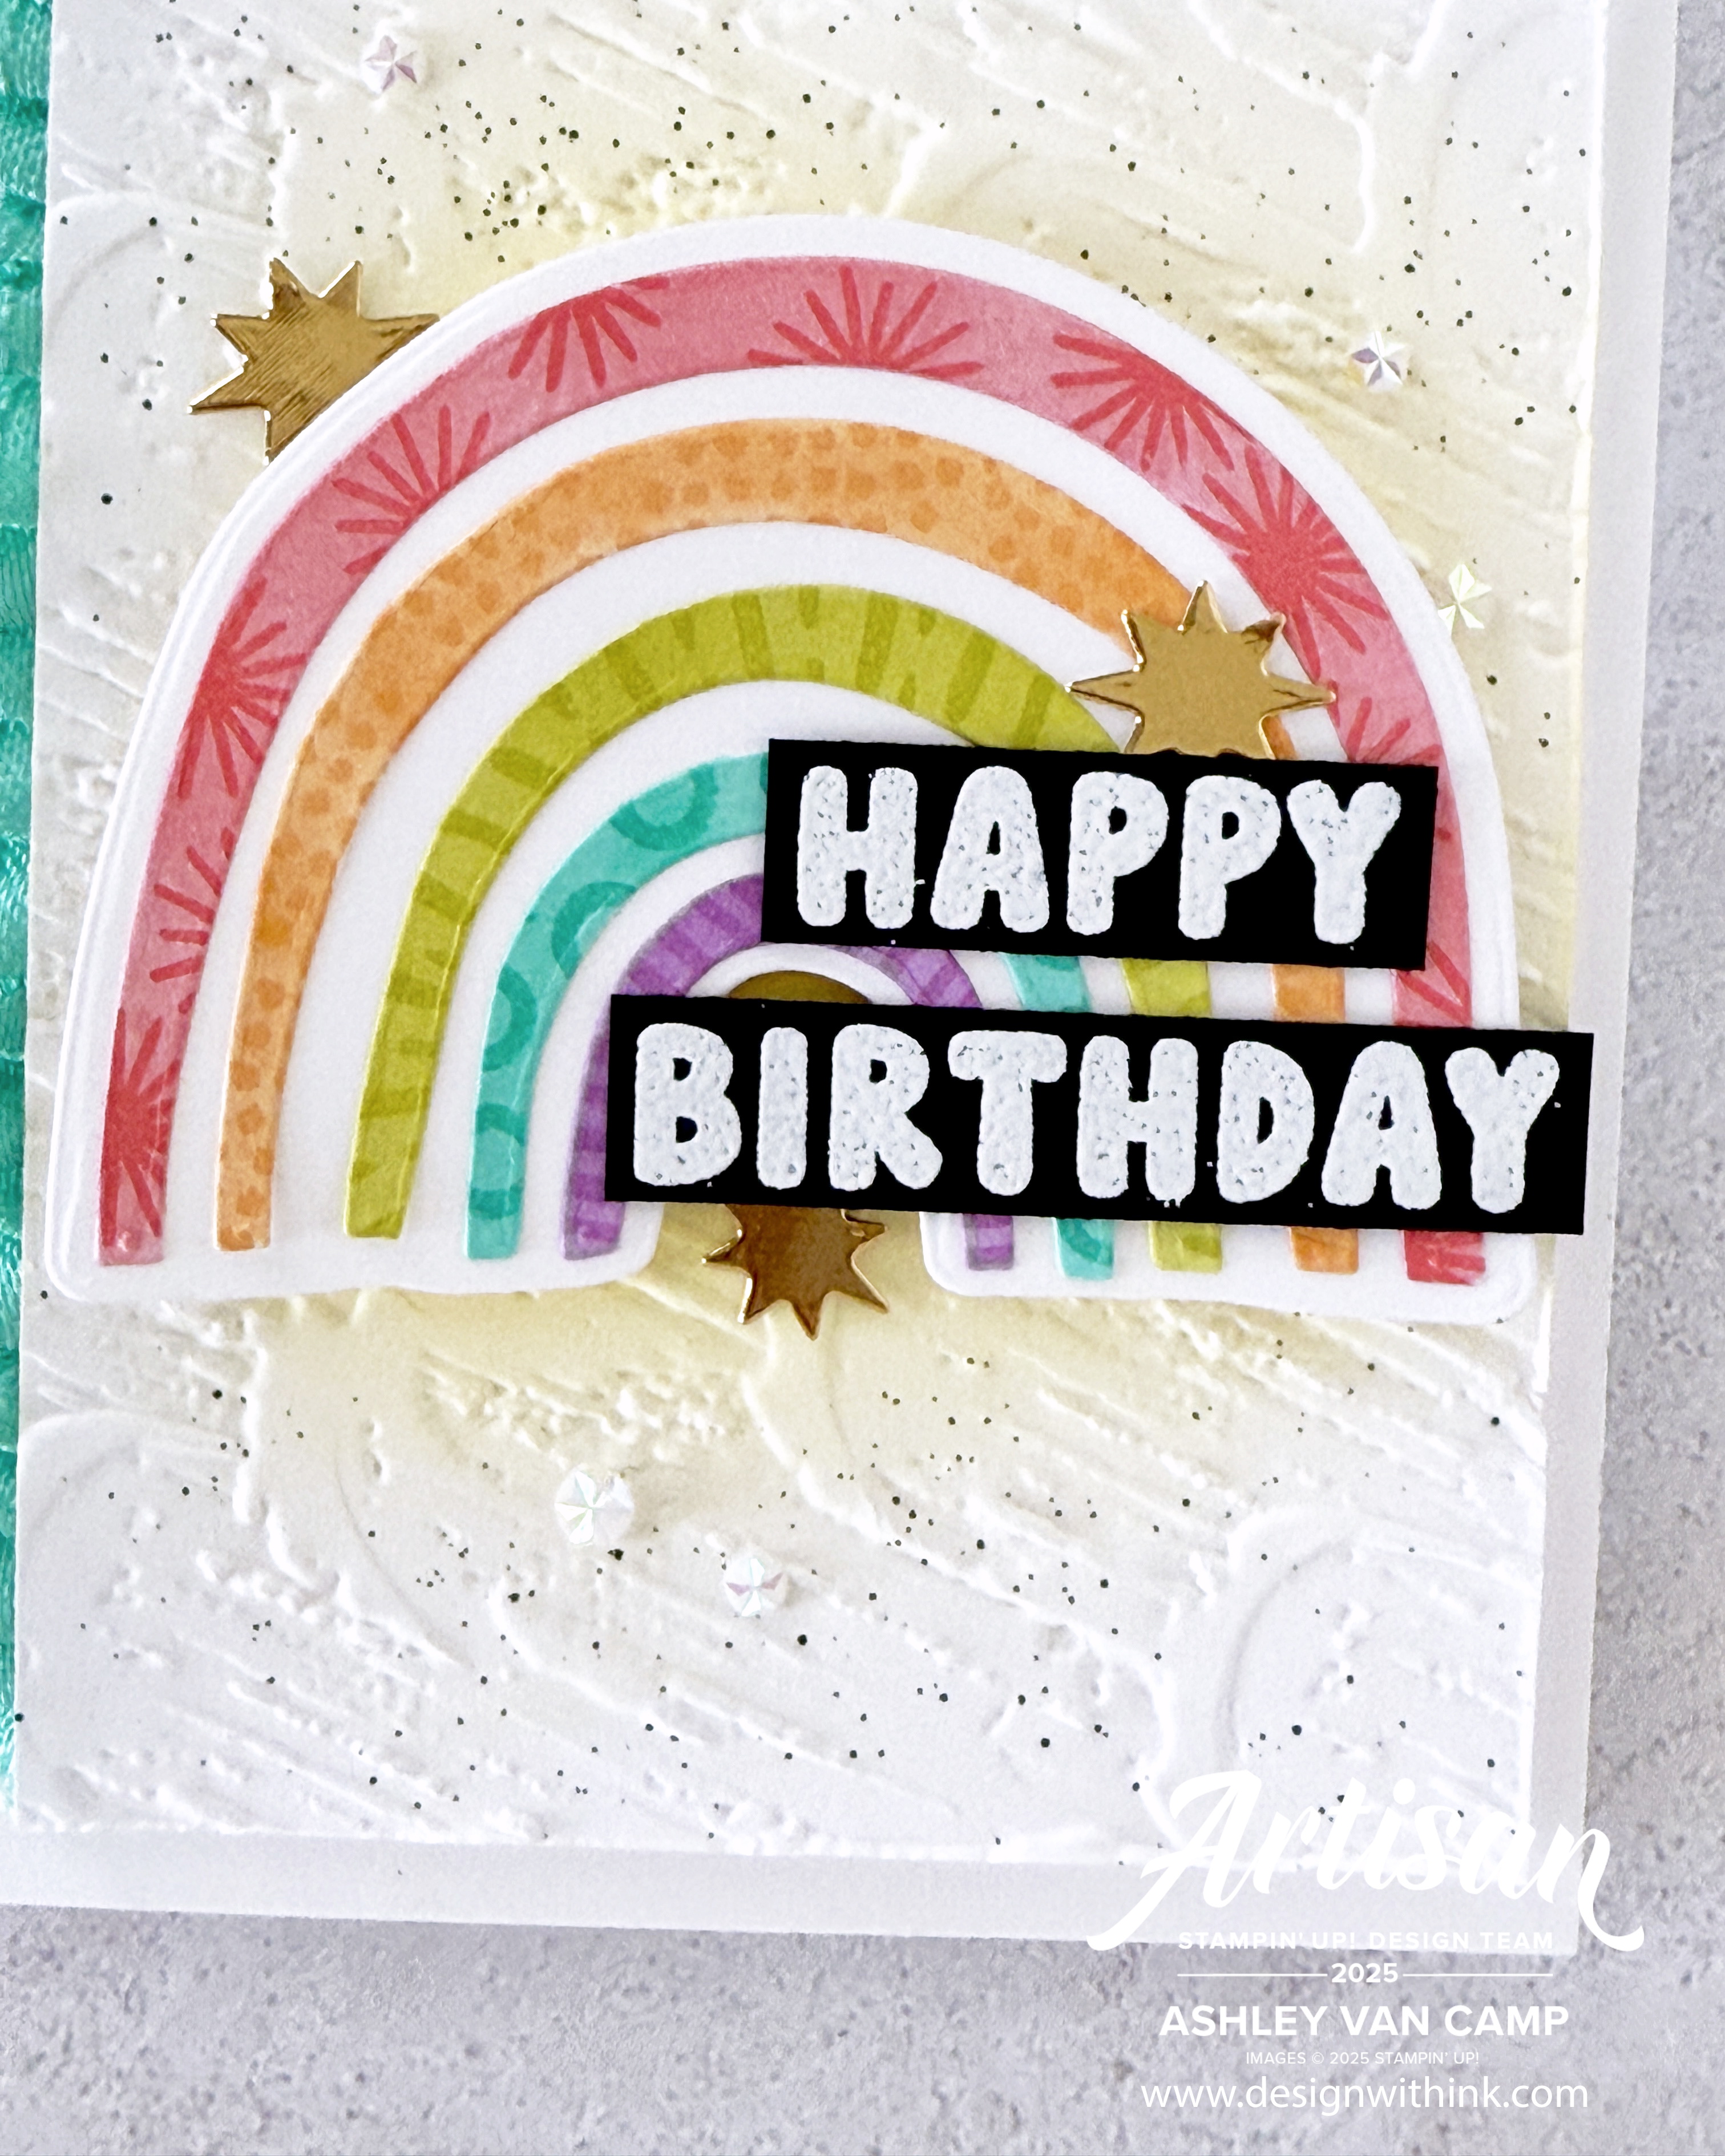
On to a few details about the next card: 


I used Blending Brushes to add color in "rainbow" order.  Then I splattered some water over it all to create that splatter look.  Emboss with the Birch Wood Embossing Folder and voila!  A gorgeous & colorful background!  It was fun to mix it up and make a "rainbow" background with white rainbows! 


Hope you enjoy these cards! Have you played with this fabulous Sunshine Vibes Bundle yet?! 


Make sure you check out all the projects from the other Artisan Design Team Members that are sharing today!  You do NOT want to miss what everyone has in store for you!  

The best place to see them is on Instagram so here is the full hoppers list: 

  • Ashley Van Camp @designwithink   ☆ YOU ARE HERE! ☆
  • Cornelia Janssen @manufaktur_herzgemacht
  • Jay Soriano @mitosucrafts
  • Lara Moss @scrappykea
  • Sarine Zijderveld@sarinezijderveld
Thanks you so much for visiting!  Please reach out if I can help you with anything!  Would be happy to help you with all your papercrafting needs!  If you need to get your hands on these, or any, Stampin' Up! supplies ... happy to help there too!  Contact me any time! 

Contact: designwithink@gmail.com

Friday, June 27, 2025

Piccadilly Players Hop #2! It Is Time For Some Faves!!!

Yippee!!!  It's time for ANOTHER Piccadilly Players Hop!  See THIS POST from our first hop & the introduction of us and the hop! 

Today this hop is all about sharing some love for our favorite ☆ NEW ☆ products from Stampin' Up!  There is a BRAND NEW Annual Catalog & FABULOUS Online Releases ... so it is not an easy choice.  But really ... it wasn't that difficult for me.  😂   Can't stop, won't stop, using the SUNSHINE VIBES Bundle.  OH.  MY.  GOODNESS.  It is just TOO good! So let's get this hop started! 

All supplies are from ©️ Stampin' Up!

Colors Strawberry Slush, Peach Pie, Lemon Lime Twist, Coastal Cabana, Fresh Freesia, Basic White, Basic Black
Inks: Strawberry Slush, Peach Pie, Lemon Lime Twist, Coastal Cabana, Fresh Freesia: + BLENDS IN SAME COLORS & Basic Black Blends (for splatter), Lemon Lolly, VersaMark
Cardstock/Papers: Basic White, Thick Basic White, Basic Black, Textured Metallic Speciality Paper
Stamps: Sunshine Vibes, Pattern of Friendship
Tools:  Sunshine Vibes Dies, Plaster Painting Embossing Folder, Heat Tool, Blending Brush
Accessories: Iridescent Faceted Gems, Basics WOW! Embossing Powder, Summer Splash 3/8" Bordered Ribbon

I had a lot of fun playing with these rainbow pieces.  For reference ... here is a photo of the bundle.  Then I will break it down a bit about what I did on this card! 


So much fun, right?!  So may layers and options and fun things to do!  For this I kept it pretty simple.  Here were my steps to create my rainbow: 

    🌈  Die-cut the large rainbow base piece from Basic White Cardstock. 

    🌈  Add Adhesive Sheet to the back of Basic White Cardstock.

    🌈  Die-cut the solid rainbow layers die-cut piece.

    🌈  Use Blends Markers to color your rainbow layers in desired colors!  NOTE: I used Strawberry Slush, Peach Pie, Lemon Lime Twist, Summer Splash, & Fresh Freesia. 

    🌈  Use the stamps from the Sunshine Vibes (as shown in the photo below) to stamp the rainbow layers - stamped in the same ink color as Blends Marker used.

    🌈  Peel off backing and adhere the layers to the base rainbow piece! 


So easy and fun, huh?!  Then it's just adding some other fun details & you have a fabulously cheerful card for a special someone's birthday!  I. Love. This. Rainbow. 💖

I do want to point out this fun detail too ... that ruffle ribbon edge! 


I just used the Summer Splash 3/8" Bordered Ribbon (on the Last Chance list so grab this quick!) and adhered it down the back on the side.  I used the Tear & Tape Adhesive and then just folded the ribbon back and forth down the whole side.  Then added another strip of tape over it all when I was done.  It's so fun & adds some stunning texture to the card!

Here is another look at the full card ... 


Now, guess what?!  Yes you got it!  It's time to keep hoppity hopping to see what everyone else made to share!  There is SO! MUCH! GORGEOUS! INSPIRATION in store for you!  We are hopping on Instagram so head on over to my page - @designwithink to follow along! 

And here is a full list of the hoppers and their IG accounts! 

Elizabeth @seeinginkspots 
Dani @danisthoughtfulcorner 
Monique @stampin_met_monique 
Teri @alaskastamper 
Maheswari @maheswarirajaguru 
Su @aromasandart 
Yvonne @thecreativeteacup 
Bree @craftsomnia 
Mikaela @thecraftyoinkpen 
Verena @simple_stamper 
Ashley @designwithink 
Daniella @edelpappe 
Kim @simplyfairies_kimfee 
Narelle @narellefarrugia

Thank you for visiting and hopping along with us!  Please let me know if you have any questions!  Would love to help you with all your papercrafting needs!  And of course would love to help you get your Stampin' Up! needs met as well!  (If you live in the United States.)  Don't hesitate to reach out! 

Contact: designwithink@gmail.com

Some More Extraordinary Flora for TGIF Challenge #531!

Ready for another fun TGIF Challenge?!  ME TOO!  Hee.  This week it is a fun theme challenge!  "Garden Gate" is the theme and you can use anything it that inspires you!  The colors, garden vibes, etc, etc.  I can't wait to see what you come up with.  Here is what I came up with ... 

All supplies are from ©️ Stampin' Up!

Colors Crumb Cake, Basic White, Basic Beige, Assortment from Watercolor Pencils
Inks: White Craft, VersaMark, Watercolor Pencils Assortment 1 & 2
Cardstock/Papers: Crumb Cake, Basic White, Basic Beige, Basic Black
Stamps: Extraordinary Flora, Pattern of Friendship
Tools:  Extraordinary Flora, Notes & Totes Dies, Birch Wood Embossing Folder, Blender Pen, Heat Tool
Accessories: Baker's Twine Essentials Pack, Iridescent Faceted Gems, Basics Wow! Embossing Powder

And here is the official challenge so you can get your own inspiration!  Isn't it so pretty?! 

My card may be more of a "Garden Fence", but I love it!  It was a lot of fun to create.  I have done a similar one before, but with the new Extraordinary Flora Bundle - I had to do it again.  I LOVE LOVE this bundle!  😍


Now it's time to head on over to the TGIF Challenge Blog to see what the other TGIF Challenge designers have created for you & play along with us!  

Thank you for visiting!  Please let me know if you have any questions!  And if you need help getting any Stampin' Up! supplies ordered - would be happy to help you with that!  

Contact: designwithink@gmail.com

Tuesday, June 24, 2025

Pretty Florals For Floral Delight With Stampin' Fancy Friday!

Florals are fabulous, aren't they?!  So make sure you are checking out this month's Stampin' Fancy Friday challenge! It is all about Floral Delight!!! 💖  And all of us on the Design Team are very excited about it!  There is loads of gorgeous inspiration to be found on the Stampin' Fancy Friday IG page! (@stampinfancyfriday)

I used the Pretty Florals Bundle & the Pressed Flowers Embossing Folder from Stampin' Up! (@stampinupofficial) to create this dainty floral thank you card.  I will also give a shout out to that fun Perennial Postage die-cut gold edge! 

All supplies are from ©️ Stampin' Up!

Colors Fresh Freesia, Coastal Cabana, Crumb Cake, Lemon Lime Twist, Basic White, Gold
Inks: Fresh Freesia, Coastal Cabana, Lemon Lime Twist, VersaMark
Cardstock/Papers: Crumb Cake, Basic White, Floral Impressions Designer Series Paper, Adhesive Sheets, Gold Foil Sheets
Stamps: Pretty Florals
Tools:  Pretty Florals Dies, Perennial Postage Dies, Pressed Flowers Embossing Folder, Water Painter, Heat Tool
Accessories: Baker's Twine Essentials Pack, Holographic Resin Dots, Basics Wow! Embossing Powder


Now on to some details!  I used one of the patterns from the Floral Impressions Designer Series Paper pack as the background to the card.  I liked the subtle Fresh Freesia pattern to add just a little flair but still make those darling florals pop.  ***Fun tip:  add Adhesive Sheet to the back of cardstock when you will be cutting out detailed images.  (Like the leaves here.)  This creates a fun little sticker that is easy to apply to your project! 💖


I used a Blending Brush & a Water Painter to add a soft bit of Coastal Cabana ink with splatter before I embossed the card front panel with the Pressed Flowers Embossing Folder. I like the added texture it gives and how it "ground" the darling florals.  


What is your fave detail on this card?!  Here is one more veiw of the full card: 


Thank you so much for visiting!  I hope you enjoyed this card!  Please let me know if you have any questions!  I would be happy to help with all your papercrafting needs!  Don't forget to head on over to @stampinfancyfriday on Instagram to check out all the other Floral Delight inspiration! 

If you need any Stampin' Up! supplies, please let me know!  Would be happy to help you get some things ordered!  

Contact: designwithink@gmail.com

Thursday, June 19, 2025

Come ARTISAN With Us!! Hopping with Stampin' Up!'s Artisan Design Team!

We LOVE being your 2025 Stampin' Up! Artisan Design Team!  Today we are doing a fun Instagram hop & I wanted to share it here too!  Come over to IG to hop along with us to see our projects that were inspired by something we love about being an Artisan!  

📣 🙌 BONUS!!! If you are a Stampin' Up! demonstrator, you can apply now through June 30th to be on the 2026 team! 👏 🎉

I have a few bits of Artisan love of inspiration in the cards that I am sharing today!  Let's get started! 


All supplies are from ©️ Stampin' Up!

Colors Basic White, Strawberry Slush, Peach Pie, Coastal Cabana
Inks: Strawberry Slush, Peach Pie, Coastal Cabana, Pecan Pie, VersaMark
Cardstock/Papers: Coastal Cabana, Basic White, Thick Basic White, Fluid 100 Watercolor Paper
Stamps: Sunshine Vibes
Tools:  Sunshine Vibes Dies, Exposed Brick Embossing Folder, Water Painter, Heat Tool
Accessories: Baker's Twine Essentials Pack, Iridescent Faceted Gems

📦 🥰 First up ... my card uses a bundle that I received FREE in one of my Artisan boxes!  Yes ... that is right!  ONE of my boxes!  We get several throughout the year and believe me -  it is absolutely fabulous & exciting to have these boxes show up!  

🎨 😍 I was assigned this bundle for one of my assignements.  We get to participate in a variety of assignments as an Artisan Design Team member.  I love this piece because it truly has helped me grow in my creativity in more ways that I could share here! 

💓🌎 Saving the best for last ... the people!  I made a "Hello Darling" card in honor of all my Artisan friends!  The worldwide community of friendships created by being an Artisan is one that I carry with me forever.  "Once an Artisan, always an Artisan" is what this team is about. 

I will never be able to put into words what this team means to me.  But this hop is one way of trying to share!  😃  I just feel so fortunate to be an Artisan.  And we are so excited to share a bit about it all in this hop!!! 


Of course I want to share each card in a little more of a detailed way.  So let's get started! 

I think I will be obsessed with doing rainbows like this now.  Hee.  I first watercolored onto Fluid 100 Watercolor Paper.  Then dried it with my heat tool & added some gold splatter.  (To do this I just splattered Pecan Pie ink and then quickly added gold embossing powder.)  Then I used the fabulous rainbow die from this Sunshine Vibes Bundle from Stampin' Up! to die cut the individual rainbow pieces.  Look how pretty it is!!! ... 


Then I just used some of the rainbow arches mixed in with some of the other rainbow pieces from the die set that I cut out in white.  ***TIP:  Add Adhesive Sheet to the back of your cardstock before die-cutting to make them easy to stick to your project! 💖


Then these other bits were made in a few ways.  I watercolored a bit of Strawberry Slush onto watercolor paper.  Dried it, then stamped & embossed the greeting over it.  The floral image was just stamped & embossed in white embossing powder onto Basic White cardstock.  I fussy cut it out and then sponged some Peach Pie ink lightly over it.  I like doing these techniques because it gives you more control over the color saturation.  I wanted more subtle colors for these cards.  


And then one last tip.  I used the sunburst stamp to just stamp around the whole card to give it a fun background. 


I was originally just going to make one card.  But let's be honest ... I feel in love with the negative die part from the watercolored paper too.  Hee.  So I made both! 


Used the same supplies, same techniques, and got 2 cards!  That I am in love with.  Trust me ... they look better in person and I just keep looking at them.  Hee.  One last look at both cards: 


Thank you so much for visiting!  I hope you HOP on over to Instagram so you can see what everyone on the team made & shared with you! 

Here is a full list of the hoppers! 

Pamela @passionateaboutscrapbooking
Stacey @stampinwithstaceymarsh
Bree @craftsomnia
Andrea @andreaksargent
Sarine @sarinezijderveld
Jaqueline @touchofjoycs
Maheswari @maheswarirajaguru
Rochelle @thestampingblok_rochelleblok
Carina @inastempelt
Lara @scrappykea
Constanze @conibaer
Kim @kim_mcgillis
Ashley @designwithink
Marion @einilomascrap
Cornelia @manufaktur_herzgemacht
Petra @stempelstein
Eve @scrapbook_fait_avec_amour
Christine @christinecabello_latortuescrap
Jay @mitosucrafts
Yvonne @thecreativeteacup


Please let me know if you have any questions or need help with anything!  Would love to help you with all your papercrafting needs!  Would love to get you the Stampin' Up! supplies you need also!  So don't hesitate to reach out! 

Contact: designwithink@gmail.com

Friday, June 13, 2025

Extraordinary Flora Sketch for TGIF Challenge #529 ...

Who needs a fun sketch challenge to spark some creativity!  I know this helped me a lot this week!  And I played with a fun new product from Stampin' Up! ... the Extraordinary Flora Bundle!  I LOVE this stamp set/die (with bonus washi tape that you can order separately!) bundle.  You just may as well after I show you what it can do!  First up though ... here is the card I made with it! 

All supplies are from ©️ Stampin' Up!

Colors Basic White, Basic Black, Lemon Lolly, assorted shades of pink & green
Inks: Memento Black, BLENDS: Petal Pink, Flirty Flamingo, Granny Apple Green, Soft Sea Foam, Lemon Lolly, Peach Pie
Cardstock/Papers: Basic White, Thick Basic White, Lemon Lolly
Stamps: Extraordinary Flora Sunshine Vibes
Tools:  Extraordinary Flora Dies, Everyday Arches Dies, Exposed Brick Embossing Folder, Water Painter (splatter)
Accessories: Baker's Twine Essentials Pack, Iridescent Foil Gems

Pretty cute, right?!  And it is so easy!  I just stamped the large floral image, colored them with Blends Markers, and then die cut them all out with ONE DIE!!!  I even used the Mini Stampin' Cut & Emboss Machine!  😃  In love with that little mini powerhouse.  Hee.  But look how fun & easy it is to get all those fun floral images: 

I highly recommend this bundle.  This was my first time using it, but it most definitely will not be my last! 

And without further ado ... here is the sketch challenge for this week!  I pretty much kept to the sketch with just a few adaptions. 

I hope you enjoy & come play along with us this week!  Just head on over to the TGIF Challenge Blog to see what the other designers on the team made & to play along with us!  Can't wait to see what you made! 

Thanks for visiting!  Let me know if you have any questions or need me to help with anything!  Would love to help you get this bundle ordered! 

Contact: designwithink@gmail.com

Wednesday, June 11, 2025

Storytelling With Scrapbook Layouts!

Sharing a fun Technique Tuesday post that I did for Stampin' Up! as an Artisan!  It's a fun 12" x 12" scrapbook layout!  It's all about storytelling in scrapbooks.  Check it out! 

Storytelling in our scrapbooks is so important and adds so much value! The stories about people are important, yes - but don't forget that the other stories about what makes us who we are matter, also!  Today I'm sharing a layout I made about one of my favorite places on the planet, including a super-easy way to add journaling space to layouts.  So remember - it doesn't have to be difficult to be worth it!  Just record your stories!  

All supplies are from ©️ Stampin' Up!

Colors Pool Party, Lemon Lolly, Pretty in Pink, Basic White
Inks: Lemon Lolly, Crumb Cake, Pool Party, VersaMark, Basic Black Stampin' Write Marker, BLENDS: Bubble Bath
Cardstock/Papers: Pool Party TWO-TONE, Lemon Lolly, Bubble Bath, Crumb Cake, Basic Beige, Berry Burst, Strawberry Slush, Basic White, Celebratory Sips DSP
Stamps: Notes & Totes
Tools:  Notes & Totes Dies, Soft Waves 3D Embossing Folder, Heat Tool
Accessories: Basics Wow! Embossing Powder, Baker's Twine Essentials Pack

How fun is this page?!  Have to admit ... I really love it.  Hee.  So let's talk about it more!   Starting with the storytelling then I will share a few more tips that I did to get the different accents. 👏


So easy, right?!  😃  Want me to show a few details & how I made them?!  Well then let's go!  💗  I used the FABULOUS Notes & Totes Bundle from Stampin' Up! 

Let's start with the base.  Two-Toned cardstock is SO MUCH FUN!  I used the Pool Party base with 4 square panels on top.  Look at the subtle beauty that adds.  So much interest without any other supplies.  For the 4 panels on top ... I did 2 different techniques. I stamped one side of 2 of the panels.  Then I embossed the 2 other panels & sanded them to let the white core come through. Love the subtle two-tone of the same colors!  😍  Then just added them to the page catty corner to each other before adding the other details. 


This leads to a few other tips!  Check out that cute title!  I love the Mini Alphabet Dies for cardmaking.  But of course, they are pretty fabulous for scrapbooking also!  I love that you can cut the whole alphabet out with one swipe through the Stampin' Cut & Emboss Machine.  Also ... *TIP* Add Adhesive Sheets to the back before cutting out and you have easy letter stickers!  Extra fun ... add interest to the letters by adding some color with Blends Markers!  Then I lined them up using Grid Paper & Masking Paper to easily apply to color and add to my scrapbook page. 


Next tip ... now where did I get this fun flower?!  😁  

In the Notes & Totes Bundle there is this fun piece that cuts out a fun tie for the bag. I circled it in this photo: 


So I just cut out 5 of them, stamped them with the fun dotted stamp in the bundle, and adhered them together.  Love that flower!  💗

an

I already shared the fun little way I added the date & location, but here are a few more pics because I LOVE this bag die (cut out from Celebratory Sips Designer Series Paper) and all the little details from the dies.  Like really ... how stinking cute is it all layered together? And to do the sand layer, I just cut/tore a layer from Crumb Cake cardstock then used the dotted stamp again to make the sand.  


Those sunglasses!!!! 😍😍😍  Here is the full page again: 


Hope you enjoy this!  I loved making it and hope it inspires you to scrapbook those stories from your life! 💖

Let me know if you have any questions.  I would be happy to help you with all your papercrafting needs! 

Contact: designwithink@gmail.com

Places You'll Go With Use Your Stash Hop!

Time to Use Your Stash and hop with us again! Yay!  Today's all about "I Forgot I Had That!"  So come hop along with us and se...