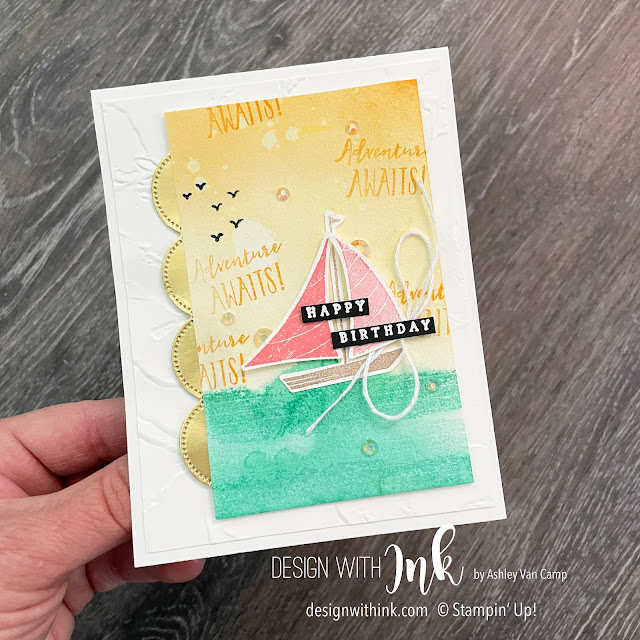
Do you know someone that loves sailboats & all things ocean?! Well me too! 💕 So I made them a fun sailboat card to wish them a Happy Birthday!

Colors: Daffodil Delight, Mango Melody, Coastal Cabana, Flirty Flamingo, White, Gold
Inks: Daffodil Delight, Mango Melody, Coastal Cabana, Flirty Flamingo, Soft Suede, VersaMark
Cardstock/Papers: Basic White, Thick Basic White, Basic Black, Gold Foil Sheets, Fluid 100 Watercolor Paper
Stamps: Let's Set Sail, Waves of Inspiration (for Happy Birthday greeting)
Tools: Sailboat Builder Punch, Heat Tool, Scalloped Contours Dies, Painted Texture Embossing Folder, Stampin' Spritzer, Blending Brushes
Accessories: Basics Embossing Powder, Iridescent Rhinestones Basic Jewels, Baker's Twine Essentials Pack
Let me point out a few fun details that make this card pop a bit. First up is the "ocean" the sailboat is sailing on. I first stamped it a few times on the bottom of my cardstock piece in Coastal Cabana ink. Right after stamping, while it was still wet, I spritzed it with water to let the colors bleed. You still get the texture from the stamp, but it becomes more "organic" with the water spritzing.

Dry the ocean with a Heat Tool, then add some color on the top using Blending Brushes & ink: Daffodil Delight and Mango Melody. I splattered some water onto that part of the cardstock, and then patted it with a paper towel. That gives the subtle splatter on the top. Stamp those cute birds and any greeting you may want in the background, and you have a beautiful background for your sailboat. Then just add the scalloped edge (die-cut using the Scalloped Contours Dies) for a fun touch of texture.
And this sailboat is so cute and fun! I stamped the sails in Flirty Flamingo...one I stamped full strength. And one I stamped "off" before stamping again to get a lighter shade of the same color. (Stamping "off" just means to stamp on scrap paper first then stamp again without re-inking.) I stamped the boat in Soft Suede. Then just punched them out! (***Tip for builder punches*** punch the punch using a piece of scrap paper first. Then as you stamp each piece...use the scrap piece as a guide to stamp your pieces. Just line up each stamp over your cardstock, stamp it, and then it is all easily lined up to punch out at once!)
One more view of the whole card with all the embellishments and little touches...
I hope you enjoy! Please let me know if you have any questions or need help with anything! I would love to help you with all your papercrafting needs. Stampin' Up! products are the best and I would love to help you grow your collection!!
Contact: designwithink@gmail.com


No comments:
Post a Comment