Friday, October 7, 2022

HELLO!!!???...Ladybug?!?! TGIF Challenge #389

Hello!  It is COLOR CHALLENGE time for TGIF Challenges this week!  You know I love a good color challenge.  This one was a bit of a challenge, but it was fun.  You see...when I show you the challenge graphic...you will probably think of one specific holiday with these colors.  So that made me NOT want to make something for that holiday, you know?!  Hee.  But I have to admit...I really love what developed...

Colors:  Basic Black, Pumpkin Pie, Daffodil Delight, Basic White
Inks:  Daffodil Delight, VersaMark, BLENDS: Pumpkin Pie Dark Stampin' Blends Marker
Cardstock/Papers: Basic White, Thick Basic White, Mango Melody, Pumpkin Pie, Black & White Designs Designer Series Paper
Stamps: Hello Ladybug 
Tools:  Ladybug Builder Punch, Heat Tool, Painted Texture Embossing Folder, Stylish Shapes Dies
Accessories: Basics Embossing Powder (white), White 1/4" Crinkled Seam Binding Ribbon, Baker's Twine Essentials Pack, Iridescent Rhinestones Basic Jewels

Can you guess the color combo we are challenged to use this week?!  Well let me help!

Can you guess the holiday you may think of with these colors?!  Haha.  Halloween, right?!  So I went the opposite direction and went cutesy floral.  Hee. 

Now...you may be asking ... what is that fun, large, bold & graphic flower from?!  Well ... unless you read the title of this post (haha) ... you may be a bit surprised!  The stamp I used for this flower was the ladybug body from the Hello Ladybug Stamp Set!!!  Say WHAT?!  How?!  Haha.  Let me "show" you.  

First...I stamped the ladybug body in Daffodil Delight.  (I know...I changed it up a bit and didn't use Crushed Curry.  This is just supposed to inspire you, not define you.  Haha.  Then I took the polka dot image that is supposed to be for the wings and stamped the body with it.  The whole stamp is a bit big for the body, but since it is a photopolymer stamp, I simply "folded it" in half over my block and used the smaller portion.  Here is a photo to helpfully help explain what I am saying better.  😊

Then I just punched out the ladybugs, and adhered them together.  I added a circle (cut from Stylish Shapes Dies) to the middle of the now flower, and VOILA!  Cute little ladybug flower...


Isn't that so much fun!  Then just added a few layers and embellishments and I am in love! 😍


Love that repeating sentiment!!  I love little touches like this that add such a fun detailed touch.  One more fun element that I want to point out...

Look at that fun Pumpkin Pie ribbon!  No...Stampin' Up! doesn't sell Pumpkin Pie ribbon like this.  I just colored it with the Dark Pumpkin Pie Stampin' Blends Marker!  I love this fun trick!  The ribbon is actually the White 1/4" Crinkled Seam Binding Ribbon.  

Now that I have shared my card with you...it is time for you to come play along with us!  Hee.  So head on over to the TGIF Challenge Blog to see what the other designers have made and to play along!  Can't wait to see what you create!!!

Please let me know if you have any questions or need any help getting your hands on any Stampin' Up! supplies!  Would love to help you with all your papercrafting needs!

Contact: designwithink@gmail.com

Wednesday, October 5, 2022

Tag Celebrations Meets Textural Elements...

 Hello!  How is your week going?!  It's Wednesday!  How does time fly so fast?!  I swear it feels like it was just the weekend a second ago.  But I have a fun mid-week pick me up!  A yummy chocolate treat showing off in a cute Peekaboo treat bag!  

Colors:  Coastal Cabana, Polished Pink, Basic White
Inks:  Polished Pink, VersaMark
Cardstock/Papers: Basic White, Coastal Cabana, Black & White Designs Designer Series Paper
Stamps: Celebrate With Tags, Season of Chic (greeting)
Tools:  Celebrations Tag Dies, Heat Tool, Blending Brushes
Accessories: Basics Embossing Powder (white), For Everything Fancy Sequins, Linen Thread, Textural Elements, Soft Sea Foam 3/8" Seam Binding Ribbon, Peekaboo Treat Bags

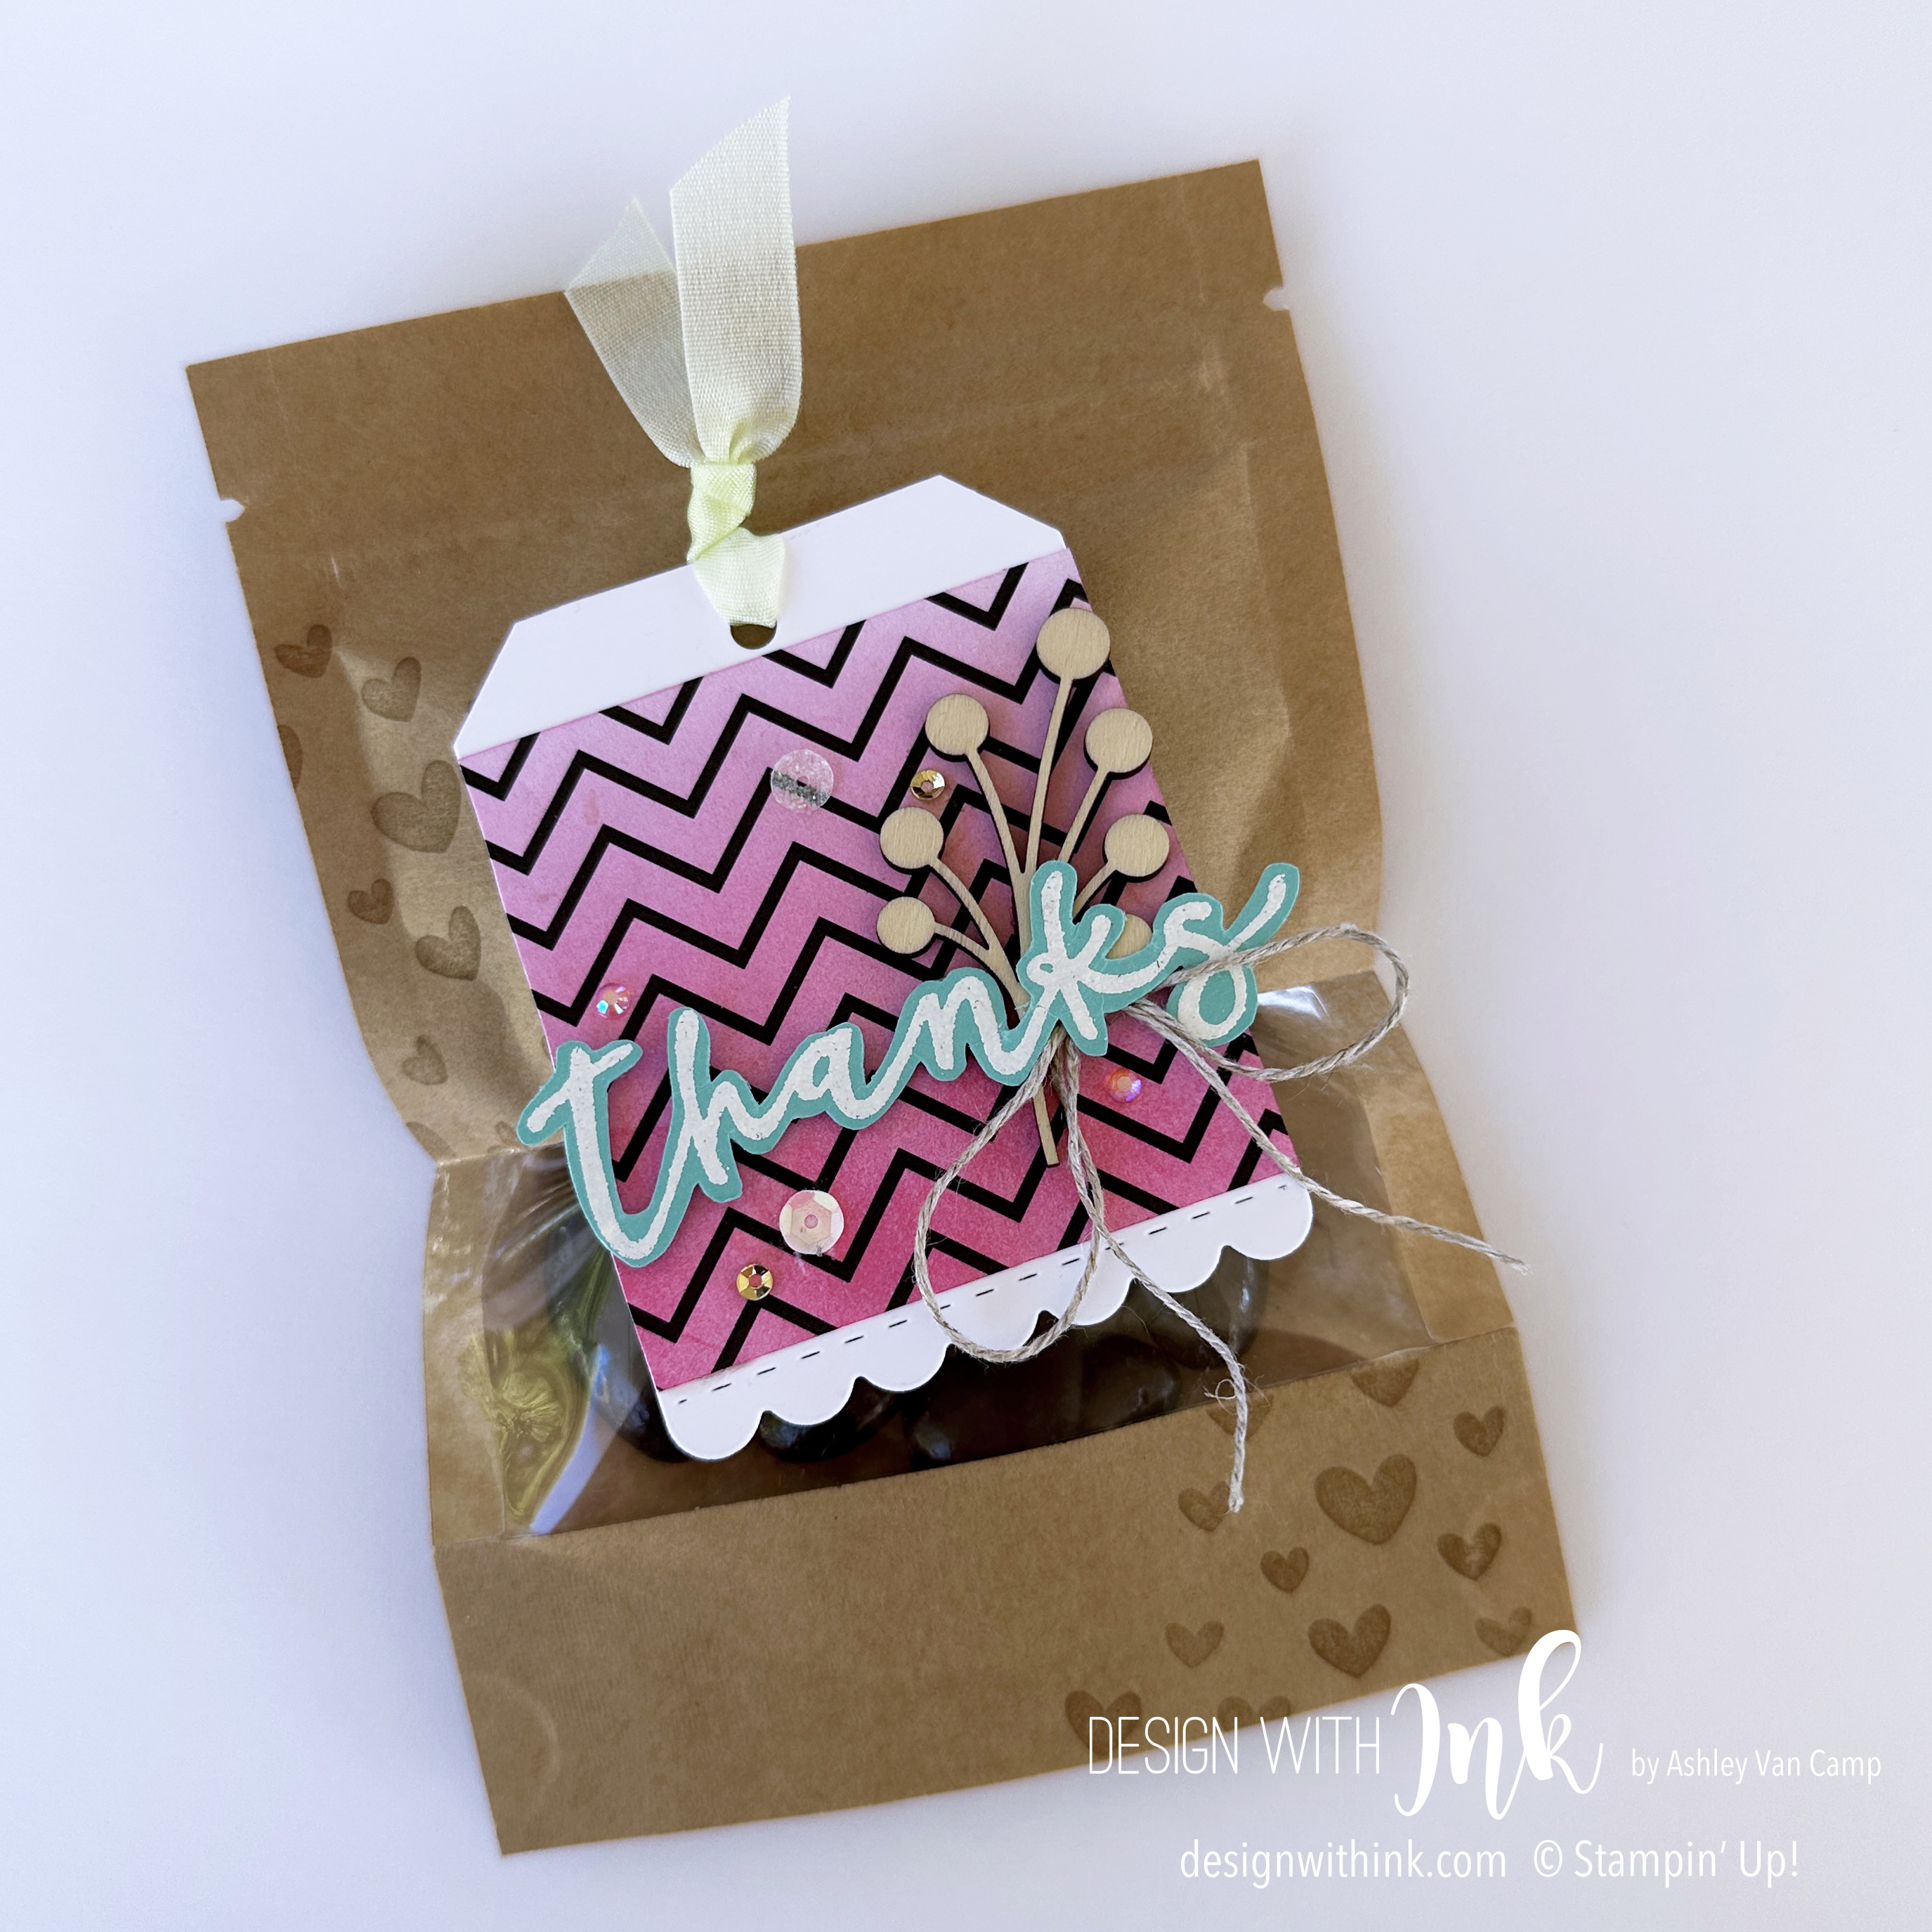
I mixed up some products from Stampin' Up!'s July-December Mini Catalog for this treat bag, and I think they all work fabulously together!  I LOVE the Textural Elements from the Boughs of Holly Suite, the Black & White Designs from the Halloween section of the catalog (that I colored with a Blending Brush!), and the Celebrate With Tags Bundle!  Some of my favorite products!!  Just look at this fun tag...

Did some ombre blending by just always starting my blending from the bottom of the paper, and working my way up.  Then adhered it to the tag that was die-cut using the Celebrations Tags Dies.  The greeting was embossed on Coastal Cabana cardstock then just cut out with scissors.  (The "thanks" is from the Season of Chic Stamp Set that is in the Annual Catalog.  I LOVE this whole bundle!) Layered it all together with the Textural Elements, Linen Thread, and For Everything Fancy Sequins.  😍😍😍

It was the perfect tag to add to these DARLING Peekaboo Treat Bags! Just had to quickly "dress up" the bag a bit.  But all I did was some quick stamping on the corners of the bag...


I love how it just all comes together...

What do you think?!  What is your favorite part?!  I think my favorite part is the ombre Designer Series Paper.  Have you ever colored your Designer Series Paper before?!

Contact: designwithink@gmail.com

Thursday, September 29, 2022

Commonwealth of Colour...a Tribute to Queen Elizabeth II

Well today is a thoughtful & special day for me.  I am participating in an event that I feel incredibly honored to be apart of.  

Welcome to the Commonwealth of Colour, a tribute to the recent passing of the late Queen Elizabeth II.  My friend of mine from the UK created this event so we could share inspiration and respect in honor of beautiful and powerful life that Queen Elizabeth II led.  All the projects you see today from those of us participating in this event are inspired by the Commonwealth and/or the amazing colours the Queen would wear.  I am so grateful to participate in this event with some of my #artisanalumni friends.  

Queen Elizabeth II was always a wonder to me.  Watching such a strong, graceful, kind, loving, dignified, powerful woman as she lead such a strong country was such an inspiration.  I will truly be forever grateful for her leadership and the mark she left on this world.  So that was the inspiration for this card...

Colors:  Coastal Cabana, Bermuda Bay, Tahitian Tide, Pacific Point, Basic White
Inks:  Coastal Cabana, Bermuda Bay, Tahitian Tide, Pacific Point, VersaMark
Cardstock/Papers: Basic White, Tahitian Tide, Pacific Point
Stamps: Through It Together
Tools:  Forever Flourishing Dies, Timeworn Type 3D Embossing Folder, Heat Tool, Blending Brushes, Artistic Mix Decorative Masks
Accessories: Basics Embossing Powder (white), Shimmery White Embossing Paste, 2022-2024 In Color Baker's Twine Pack, Brushed Brass Butterflies

I used Blending Brushes & the Artistic Mix Decorative Masks with Shimmery White Embossing Paste to create the background of this card.  The colors I blended onto the Basic White cardstock piece (yes...that gorgeous blue background started as Basic White...the same cardstock the flourish die-cut is cut from!) are: Coastal Cabana, Bermuda Bay, Tahitian Tide & Pacific Point.  Then I used one of the masks (this pattern seemed regal to me) & a palette knife to add Shimmery White Embossing Paste over it. 


I am stunned at how gorgeous it came out!  The embossing paste just shimmers, it's raised so it adds a fun texture, and I just am a bit obsessed.  Haha.

I hope you enjoy!  And now I can't wait for you to follow along with us!  Check out the explosion of colourful inspiration & join in the fun by using #commonwealthofcolor when you post your projects and share a few of your favorites to your stories!  


Thank you so much for visiting and please let me know any questions you have! 

Contact: designwithink@gmail.com


Monday, September 26, 2022

Amazing Thanks Dies for Boys To Men ... Fancy Friday September!

I hope you have been following along with Fancy Friday this month!  (We are on Facebook: Stampin' Fancy Friday or Instagram: @stampinfancyfriday.) It is a fun challenge...masculine cards!  And it is time for me to share my card with you!

Colors:  Coastal Cabana, Parakeet Party, Tahitian Tide, Basic White, Basic Black
Inks: Tuxedo Black Memento, VersaMark
Cardstock/Papers: Basic White, Coastal Cabana, Parakeet Party, Tahitian Tide, Basic Black, Black & White Designs Designer Series Paper
Stamps: Happiness Abounds (greeting)
Tools:  Amazing Thanks Dies, All That Dies, Brick & Mortar 3D Embossing Folder, Heat Tool
Accessories: Basics Embossing Powder (white)

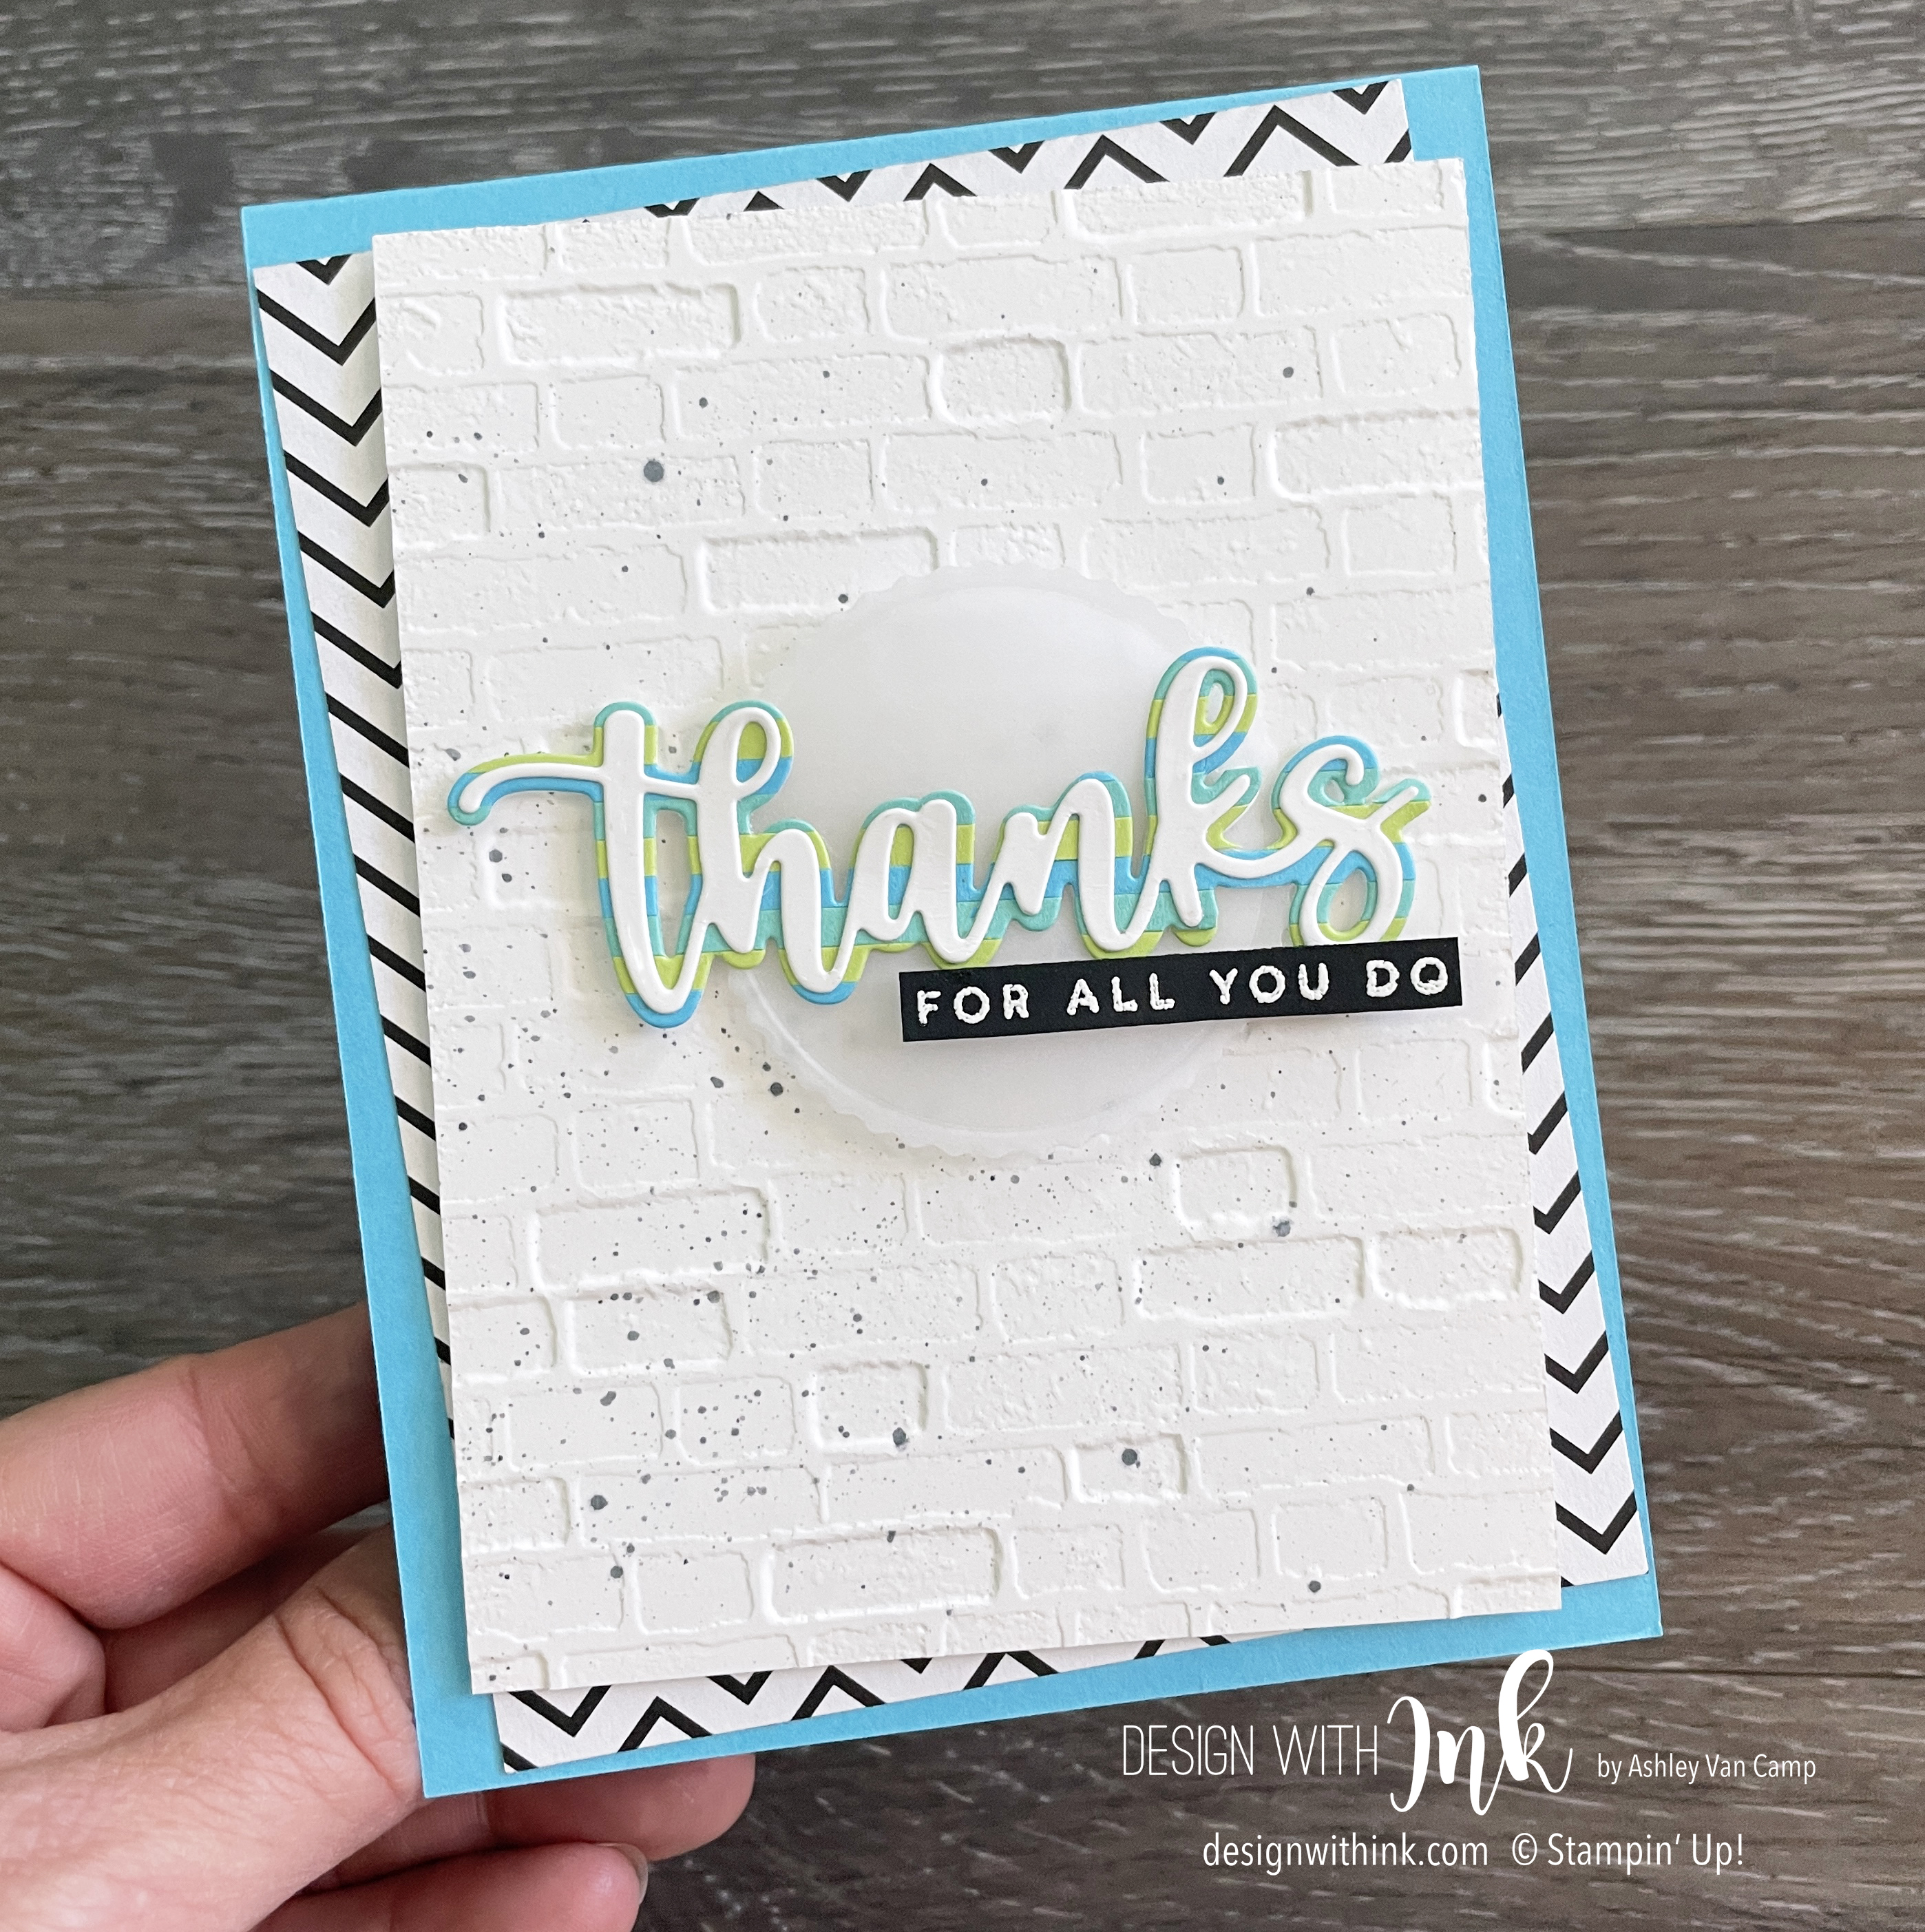
When making cards for Boys to Men, I tend to lean towards clean & simple…but impactful. I mean…just look at that fun striped background of the thanks die-cut! (PS...I LOVE LOVE the Amazing Thanks Dies!  Layered words have my heart! 😍) You simply just cut narrow cardstock strips in colors of your choosing (Coastal Cabana, Parakeet Party, and Tahitian Tide for this card), adhere to Adhesive Sheets (another FABULOUS supporting character!!!  Makes it a breeze!) , die-cut, & boom! Impactful. 

I mean...how fabulous is it all when all the pieces are layered together!!! Major swooning!!! 😍😍😍


I super love everything on this card...including the Brick & Mortar embossed and splattered piece (I used the opposite embossed side from what I normally use for this card!), the Designer Series Paper, and the vellum layer under the greeting.  I think it all just works together to make a simple, but impactful, "manly" card!!!


I hope you enjoy this card!  Now just head on over to Facebook or Instagram to see what the rest of the Stampin' Fancy Friday Design Team has been up to this month with this challenge!  


Thank you so much for visiting!  If you need any help, have any questions, or need to get any Stampin' Up! supplies...please just let me know!  I would be happy to help with it all!!!

Contact: designwithink@gmail.com

Friday, September 23, 2022

Fussy Cutting with Simply Fabulous...TGIF Challenge 387:

It is TGIF Challenge time!  👏 Woot!  I can't wait to see what you make for this challenge, and I am so excited to share with you what I made! 😀 And it is a fun technique challenge this week!  

Colors:  Pool Party, Pale Papaya, Flirty Flamingo, Orchid Oasis, Soft Sea Foam, Basic White
Inks:  Pool Party, Pale Papaya, Flirty Flamingo, Orchid Oasis, Crumb Cake, Soft Sea Foam, VersaMark
Cardstock/Papers: Basic White, Kraft, Black & White Designs Designer Series Paper
Stamps: Simply Fabulous, Hello Beautiful
Tools:  Timeworn Type 3D Embossing Folder, Heat Tool, Water Painter (for splatter)
Accessories: Basics Embossing Powder (white), Champagne Rhinestone Basic Jewels, Orchid Oasis 1/8" Woven Metallic Ribbon

Can you guess what the technique is?!  Why...it is a "Cut It Out" Challenge!  This can mean whatever you want it to mean...but for me...I went the fussy cutting route!  I LOVE LOVE LOVE the Simply Fabulous Stamp Set, so I went to town cutting out some flowers & leaves! 


It was a lot of fun...I find fussy cutting very relaxing.  I also wanted to add some fun details.  So I stamped the splotch image (from the Hello Beautiful Stamp Set) on the background, embossed it, and then added some splatter.  Then all the fussy cutting went on top.  Add the focal point in the greeting and voila!  Card is mostly done.  😊


Wondering where I got those threads from the bow?!  Well...it was from the Orchid Oasis Woven Metallic Ribbon! I just cut a piece, separated the pieces, and then tied them into a bow!


Pretty fun to see beyond what things may just look like at first glance.  💗


Anyway...I hope you enjoy this card!  Please let me know if I can help you with anything!  Can't wait to see what you make!  Check out what the other designers made and then post your creation over on TGIF Challenge Blog! 

And let me know if I can help you get any fun Stampin' Up! supplies sent right to your house!  Would love to help you with all your papercrafting needs!
Thanks for visiting! 
Contact: designwithink@gmail.com

Wednesday, September 21, 2022

Thanks to Season of Chic!

One of my favorite bundles in Stampin' Up!'s Annual Catalog is the Season of Chic Bundle!  The bundle comes with a FABULOUS stamp set & coordinating dies set that is SOOOO versatile!  It has flowers, seashells, leaves, and snowflakes!  I highly recommend this bundle, and I LOVE crafting with it.  Here is the latest card I made using this bundle.  

Colors:  Polished Pink, Coastal Cabana, Parakeet Party, Basic White
Inks:  Polished Pink, Coastal Cabana, Parakeet Party, Tuxedo Black Memento, VersaMark
Cardstock/Papers: Polished Pink, Basic White, Basic Black, Vellum
Stamps: Season of Chic
Tools:  Chic Dies, Timeworn Type 3D Embossing Folder, Heat Tool, Water Painter (for splatter)
Accessories: Basics Embossing Powder (white), Elegant Faceted Gems, Baker's Twine Essentials Pack, Rose Gold & White Striped Ribbon

I love the layers on this...the stamping, the splatter, the vellum (you can still see the fun stamped colors underneath!), the embossing, etc.  I LOVE the watercolor swoosh image in the stamp set.  I stamped it in 3 separate colors here, and I have to admit...I'm a fan. Haha.  


Just a few more pics of some details:


What do you think?!  What is your favorite detail?!  Want to see the whole bundle?!  Here you go!

SEASON OF CHIC BUNDLE!

Do you agree?!  HOW MUCH FUN is this?!  Stay tuned for more projects using this bundle for sure.  😀 Let me know if you need help ordering this bundle, or any other Stampin' Up! supplies.  Happy to help you with all your papercrafting needs!

Thanks so much for visiting!  Let me know if you have any questions!  I am also on Facebook - Design With Ink or Instagram @designwithink.  

Contact: designwithink@gmail.com

Wednesday, September 14, 2022

Hues of Happiness + Celebrations Tag = Happiness Abounds!

Recently I attended Stampin' Up!'s BackStage event for leaders.  (I shared some of this on Facebook - Design With Ink & Instagram - @designwithink.)  So check that out if you haven't seen that!  😀 Well...I was SOOOO excited about getting back to in person events...this was the first Stampin' Up! convention type event since Nov 2019!...and I couldn't wait to see people! So of course I had to bring some gifts!  And of course I had to make a cute tag for the gifts!  Haha.  I have to admit...when I sat down to make some tags...my brain went blank.  I just couldn't think of anything.  Looked around my craft room for inspiration and BAM! 💥 I saw the Happiness of Hues Designer Series Paper.  So I grabbed my paper snips, and went to town!  And this is what I came up with!  Since my fave thing to do when I make multiples of something is see them in a big pile...that's how I will show them to you first!  Haha.  (I have lots of pics to share, so don't worry!) 

Colors:  Coastal Cabana, Melon Mambo, Daffodil Delight, Mango Melody, Granny Apple Green, Mossy Meadow, Kraft
Inks:  Coastal Cabana, Tuxedo Black Memento, VersaMark
Cardstock/Papers: Kraft 6"x6", Fluid 100 Watercolor Paper, Hues of Happiness Designer Series Paper 
Stamps: Happiness Abounds
Tools:  Celebrations Tag Dies, Heat Tool
Accessories: Basics Embossing Powder, Iridescent Rhinestones Basic Jewels, White 1/4" Crinkled Seam Binding Ribbon

Aren't they so sweet?!  I used the Celebrate Tag Dies for that darling scalloped tag shape!  And then cut out lots of flowers and leaves from the Designer Series Paper!

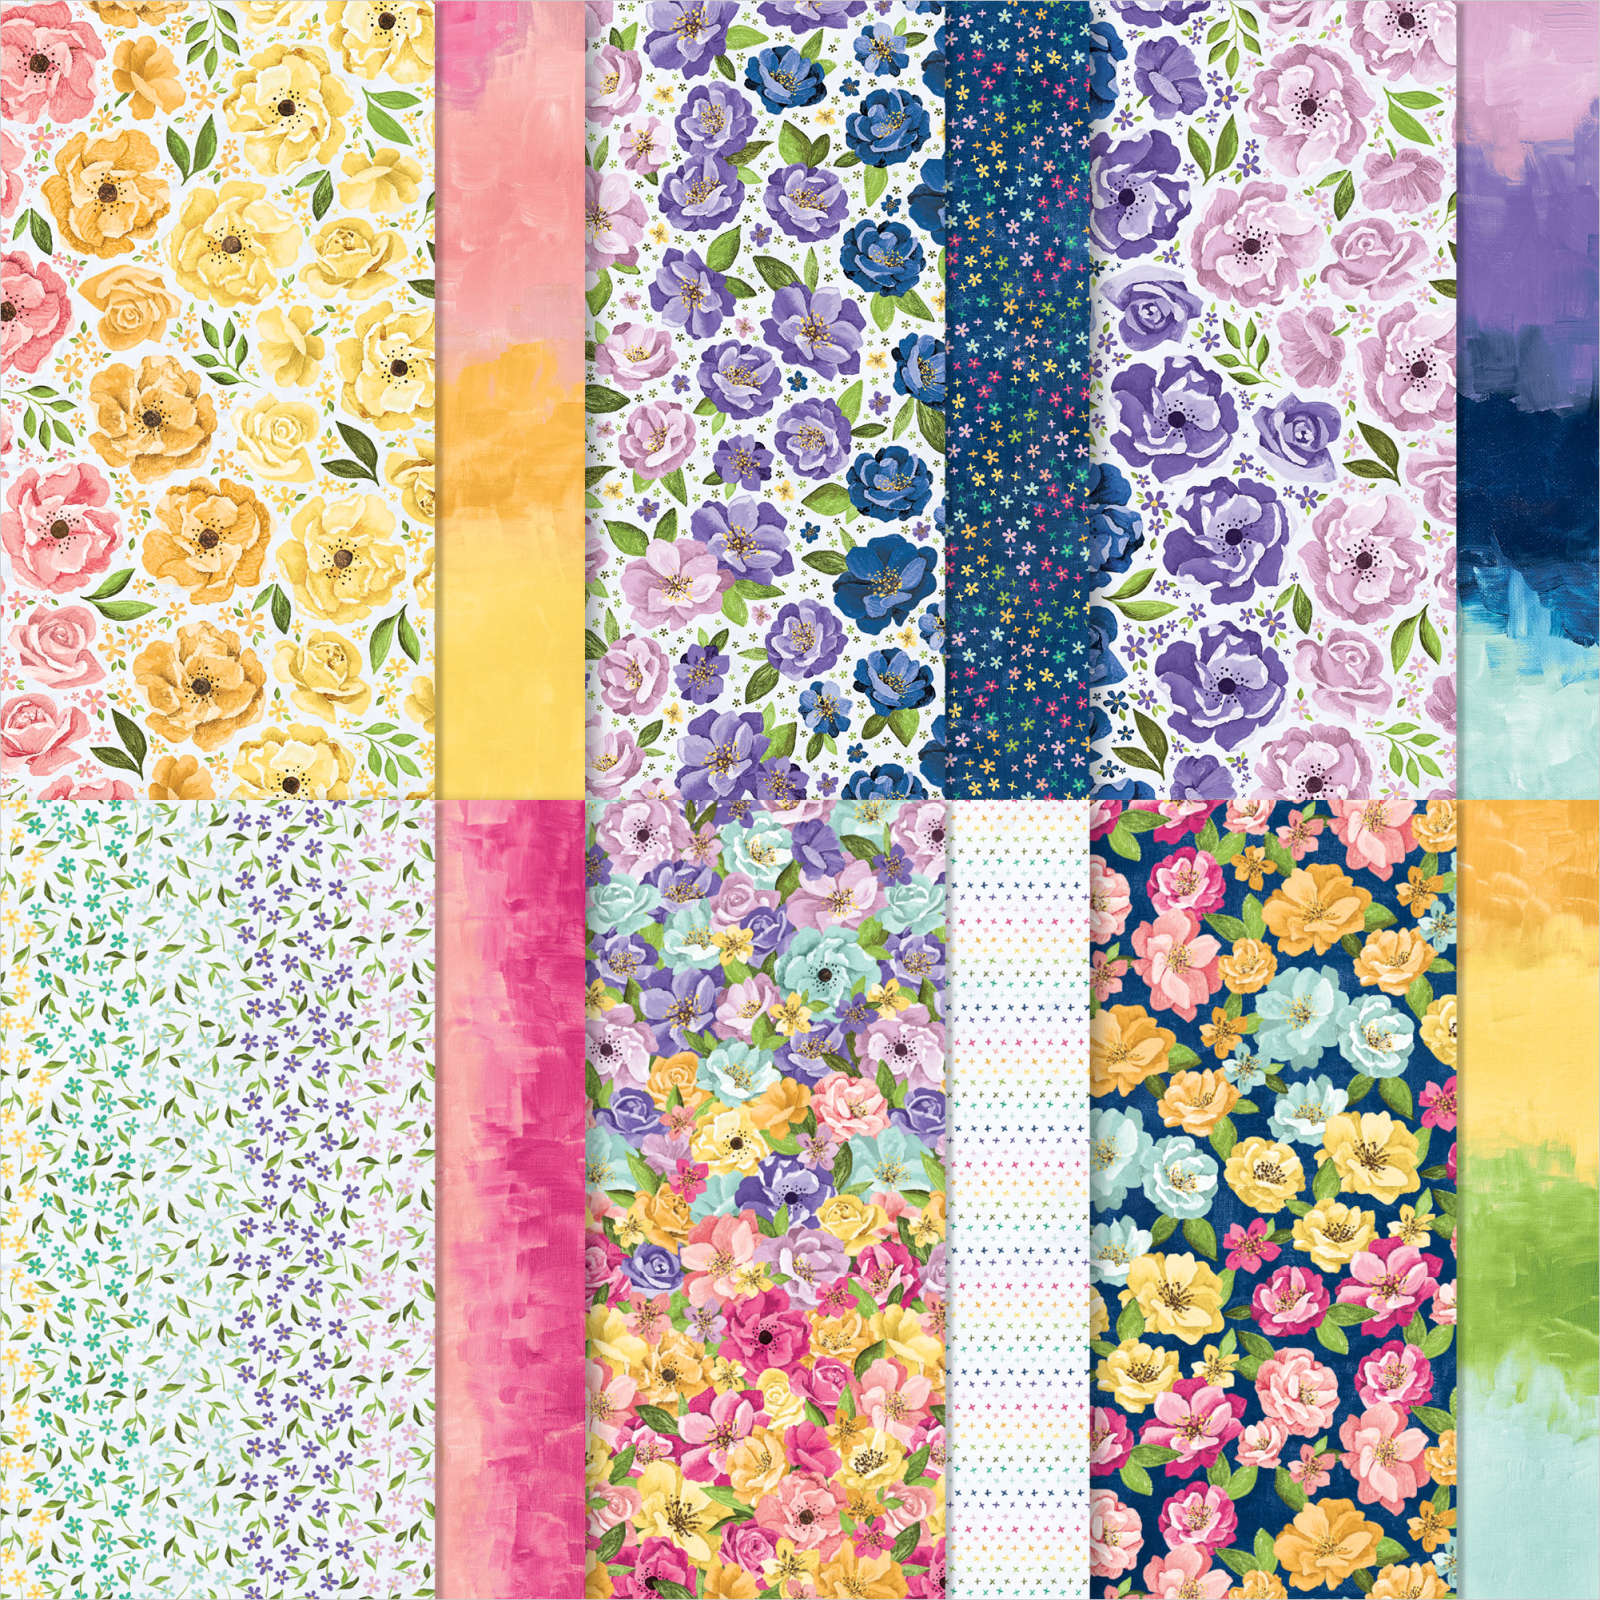
Here is the picture of the whole pack of paper and then the specific sheet of paper I cut from.  (© Stampin' Up!)  Isn't this paper SO GORGEOUS!!!!  Major swoon!!! 😍😍😍

HUES OF HAPPINESS DESIGNER SERIES PAPER


I really quite like fussy cutting, and it was quite relaxing cutting the florals and leaves out.  They I just did a watercolor wash on the tags (after the tags were cut from Fluid 100 Watercolor Paper...when watercoloring...the paper DEFINITELY makes a difference!), splattered some ink, layered the cut florals, and added a fun embossed greeting!  (Can we talk about how much I love white embossing on Kraft cardstock?! 💗) 

Ready for photo overload?!  Well here you go!  Obviously, they are all a little bit different...so here is a photo of all of them!


Then some photos where you can see all of them a little better...


And some shots of the details!  Is it appropriate to say that these just make me so happy?!  I kinda wish I could stare at them all day long!  Haha. 


I LOVE THESE!  Want to see what I tied them to?!  


This book is amazing!  It's called Sketch Mayhem!  It is a book my friend has published that gives you a place to design your card sketches, color combos, etc!  It is so much fun & a great tool for crafters!!!  You can order them on Amazon & they come in all sorts of colors! Order here: SKETCH MAYHEM (no...not paid for this!  Haha.  I just love this book so much that I wanted to share!) 

Here's the cute tag tied onto the book!

Hope you enjoy!  Thank you so much for visiting!  Also hope you look at your Designer Series Paper in a new way!  Cut some images out and see what you can create!  Let me know if I can help you with your papercrafting or acquiring any Stampin' Up! supplies! 

Contact: designwithink@gmail.com

Friday, September 9, 2022

Biggest Wish For TGIF Challenge 385:

A quick post today to share this weeks TGIF Challenge!  It is a SKETCH Challenge!  Yay!  Reminder...a sketch is a card map that you use as a jumping off point to a card design!  But use it as inspiration...it doesn't have to be exact!  Can't wait to see what you make!  Here is the card I made:


Colors:  Crushed Curry, Daffodil Delight, Coastal Cabana, Basic White, Gold
Inks:  Coastal Cabana, Tuxedo Black Memento, VersaMark
Cardstock/Papers: Daffodil Delight, Basic White, Vellum, Celebrate Everything Designer Series Paper (host only product)
Stamps: Biggest Wish, Penguin Place
Tools:  Witch Hat Builder Punch (punched stars), Heat Tool
Accessories: Wink of Stella Glitter Brush, Metallics Embossing Powder (gold), For Everything Fancy Sequins, Baker's Twine Essentials Pack

And here is the sketch for this week's challenge!

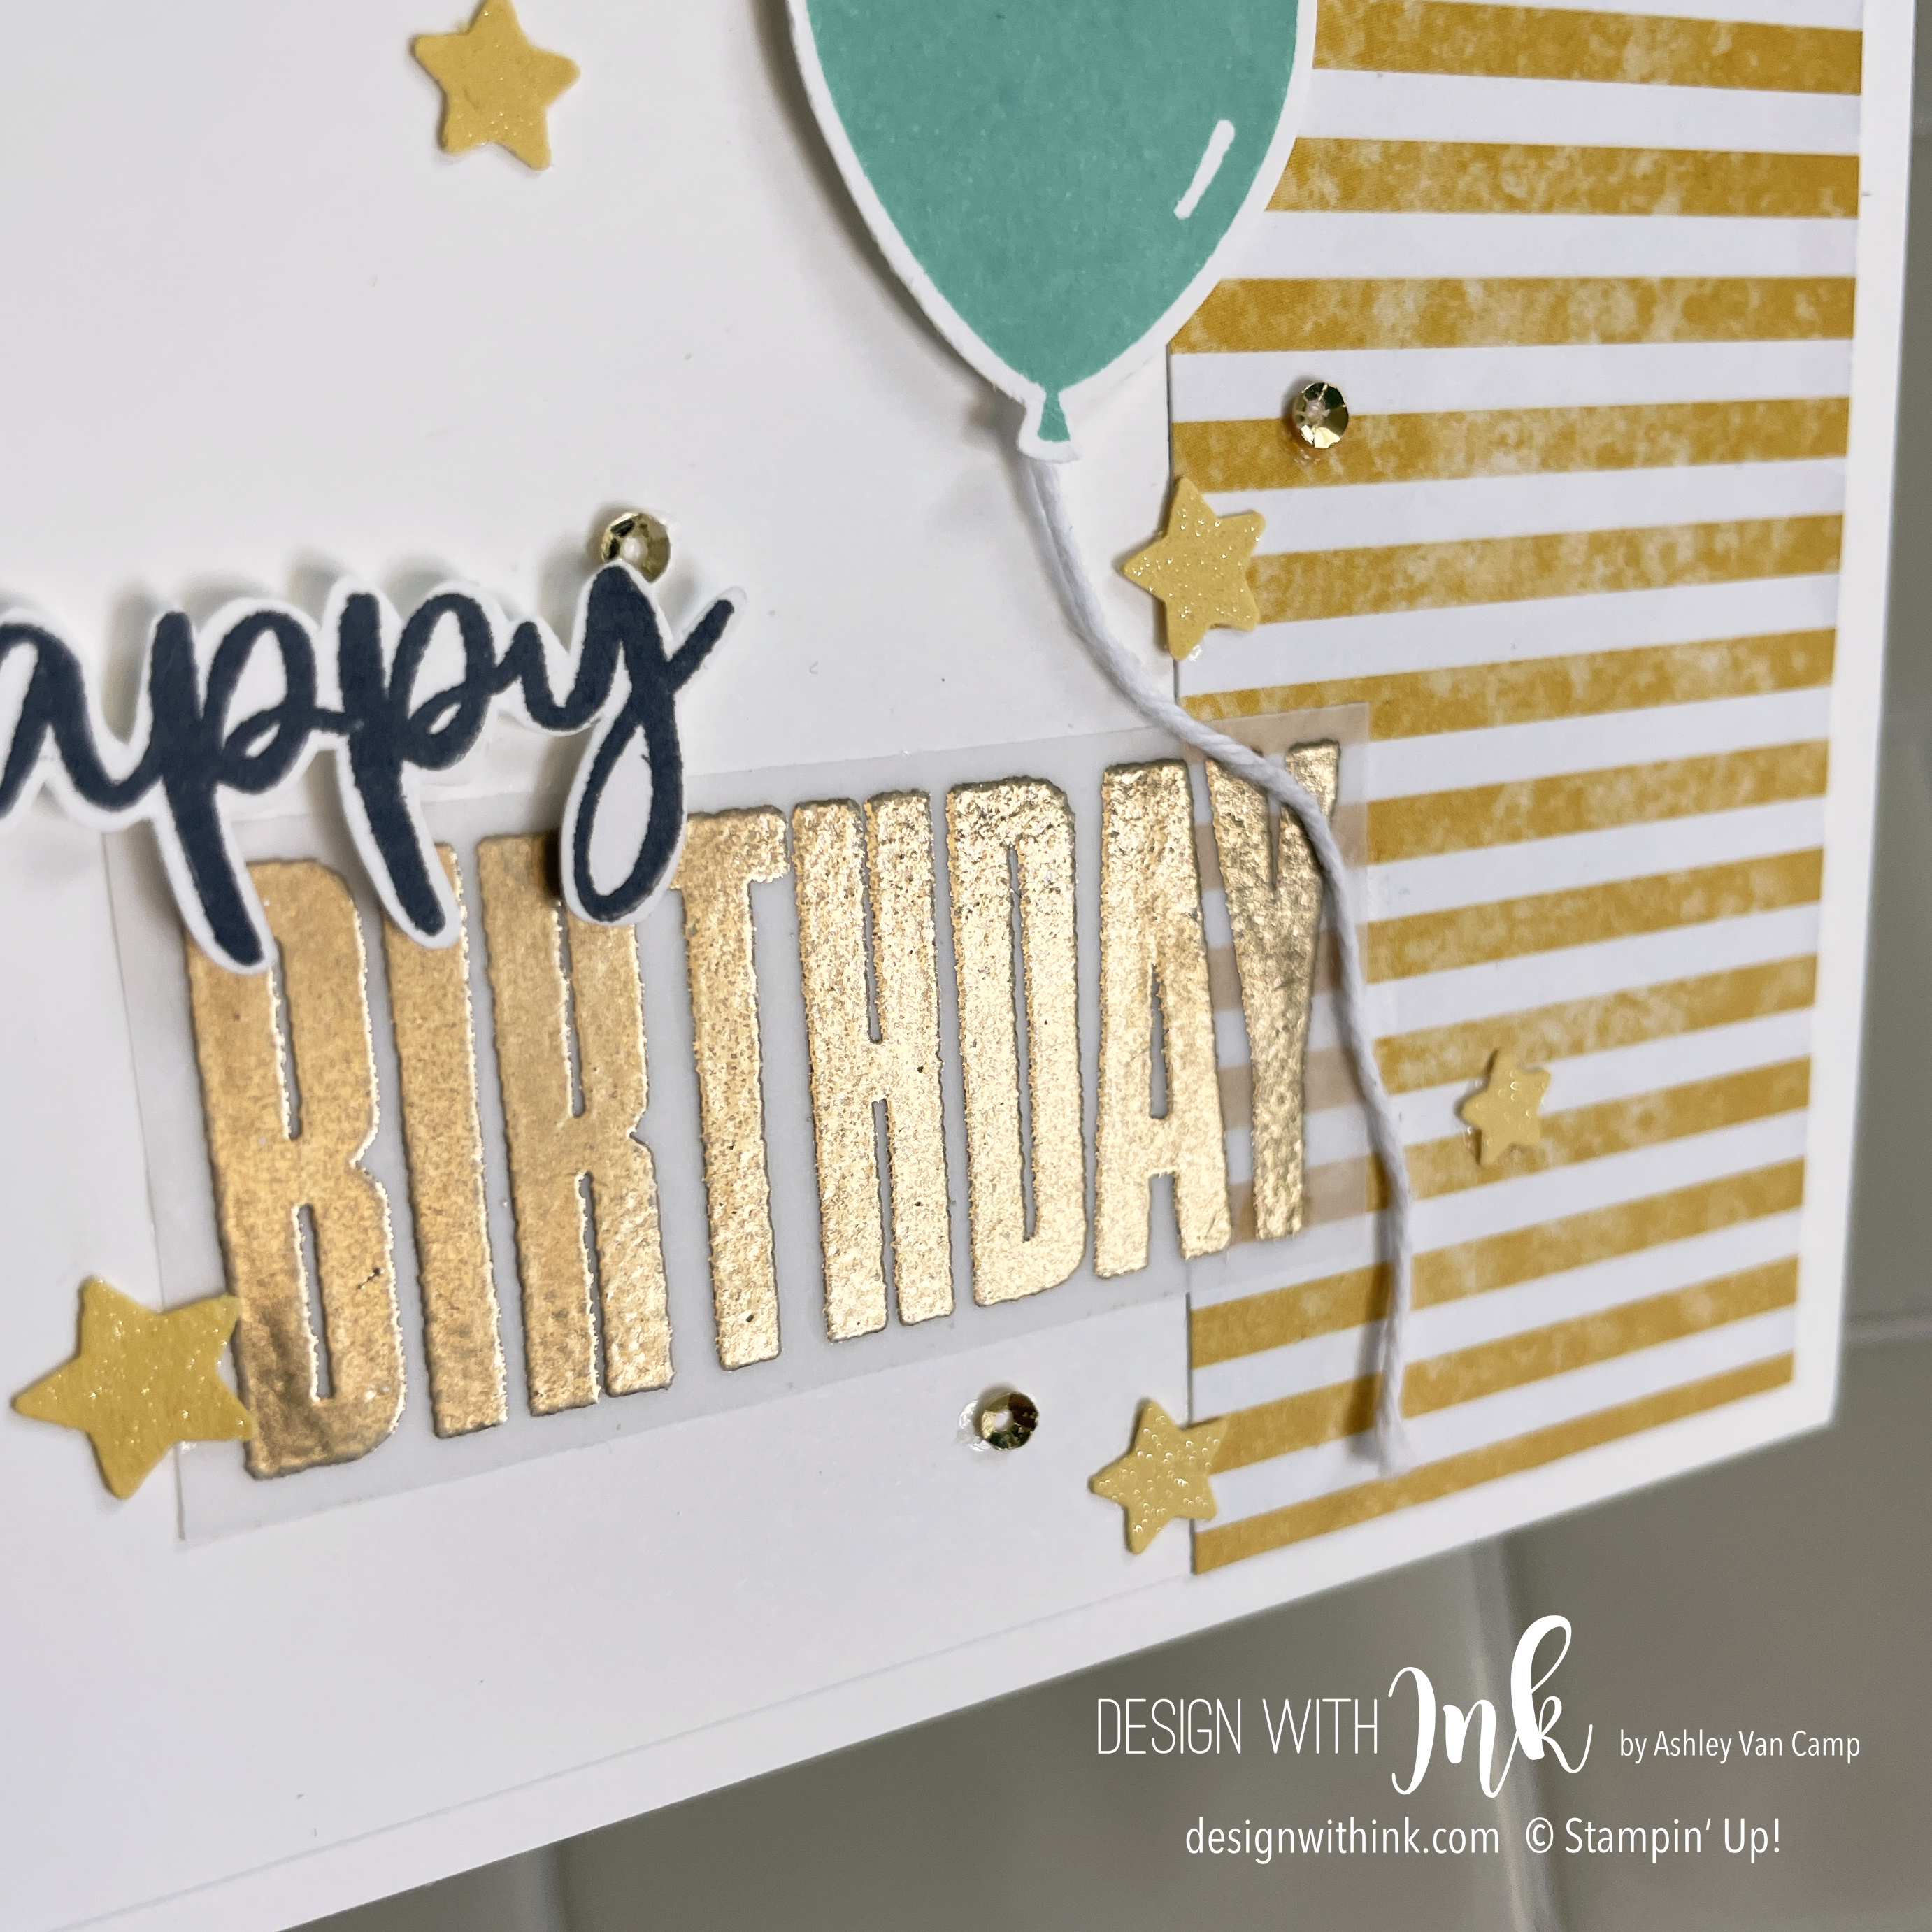
Can you tell what I changed?!  Instead of circles all aligned in a row, I used stars scattered about.  But the rest...I pretty much kept!  My favorite part may be the gold BIRTHDAY sentiment.  Hard to take a photo of, but I LOVE embossed sentiments.  It's a bit raised & adds a fun and shiny pop!  Also...don't forget about that fabulous Wink of Stella Glitter Brush!!!  I brushed it over the stars and love the glittery pop they add!  😍


Here are all the elements:


This card was fun & pretty quick to make!  What are you going to make this week?!  Head on over to the TGIF Challenge Blog to check out what the rest of the design team made.  And then follow along and make your own!  

Thank you so much for visiting!  Please let me know if you have any questions!  I would love to help you with all your papercrafting needs!  And help you acquiring any Stampin' Up! supplies that you may need!

Contact: designwithink@gmail.com


Use Your Stash! With Sunny Summer Fun!

Today is a fun Use Your Stash Hop! with a super fun theme ... Sunny Summer!  So I went all in!  I used the Rays of Light and Sharing Sunshin...