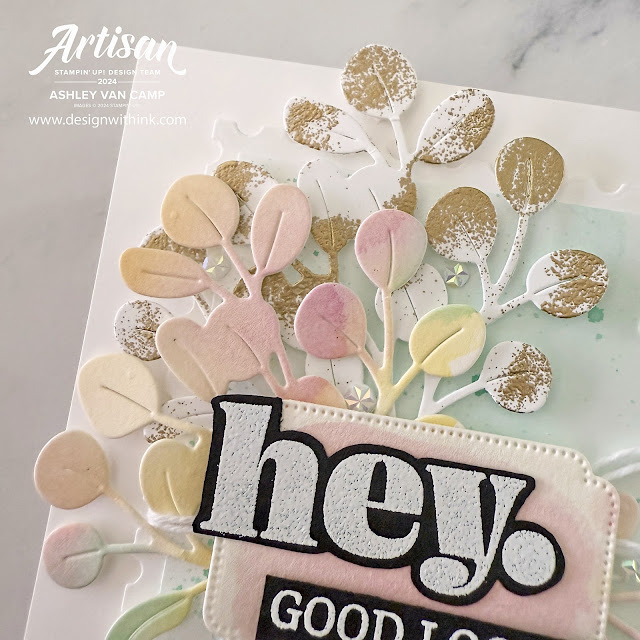
Do you ever make a project and just love it so much you can't stop looking at it?! I hope I am not alone, because those are my feelings for this card I am sharing today. 😂 Hee. I made this card WEEKS ago & I literally just can't stop staring at it. I am major swooning over here. 😍 I will confess, per usual, it is prettier in real life. Which is a bummer when I'm trying to share something on line. But hopefully her beauty still shines through whatever electronic you are seeing her on. Hee. I think maybe this card will end up being for herself, hahaha. Cause she truly is so good looking! 😂 (Yes ... I am making myself laugh as I write this.) Here she is in all her glory!
So what do you think?! Is she as good looking as I think she is?! 😂 I took a few photos of how I did the leaves and got all those pretty colors like they are. It is SO SIMPLE! Just a little easy peasy watercoloring! But here are a few photos to show you! ...
1. Use a Water Painter to add water to Fluid 100 Watercolor Paper. Add some ink from the first color you want to add. (I find working light to dark works well.)
2. Add more colors in little spots. You want a good variety of color in the die-cuts, if you want it to look similar to what I did, so small spots works best. ***TIP ... to get ink in the lid, simply squish the ink pad together a few times before opening. Then open it up like in the photo and use that little pool of ink to grab some color.
3. Add the rest of your colors! The colors that I used are: Pretty in Pink, Peach Pie, Lemon Lolly, Lemon Lime Twist, & Coastal Cabana. I think you could even use this as a background just as it is! Hee.
4. Just let it dry then die cut your pieces for this gorgeous piece! (Forgot to photograph that! Sorry!)
5. Die-cut a few extra from Basic White Cardstock. You could use one of the different dies, but I just kept it all the same. Since there is a lot going on already ... I wanted to keep that part a little more simple.
6. Dab a little VersaMark ink (I used a sponge dauber and LIGHTLY dabbed) onto different spots on the white die-cuts. Add gold embossing powder. Where the powder got either too heavy or in spots I didn't want it, I just flicked some of the powder off before heat seating. Then just heat seat with Heat Tool until shiny! Seriously ... can you even?!
I'm sorry ... but I still can't get enough. Hee. I just love how this all turned out! Here are a few more pics in case you want to bask in the beauty a bit more. Haha.
So what do you think?! Hope you enjoy! Thank you so much for visiting! Please let me know if you have any questions! Would love to help you with all your papercrafting needs! If you need to get your hands on any of these gorgeous Stampin' Up! products (and live in the US) ... let me know! I can help!


No comments:
Post a Comment